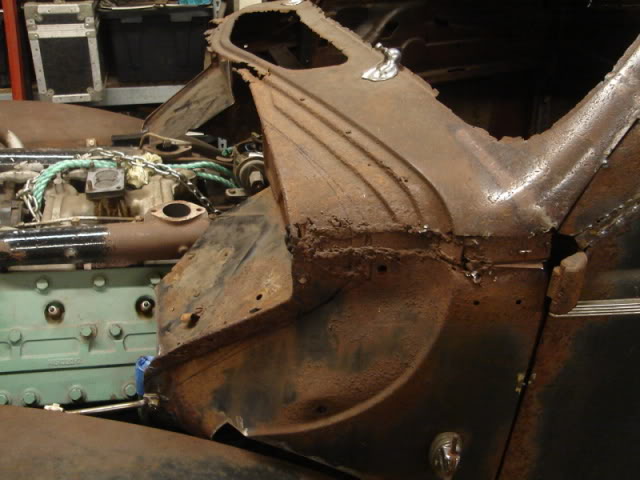
A ton of work this past week
just to get it to look like every other profile shot!
The first hurdle was really simple,
yet took forever to choose the long way or the hack way.
I went hack this time out of laziness.
Ford F100 brakes work easily on 42-48 square spindles,
but the round spindles are a little wide at the wheel cylinder.
Really I should have swapped to the later square spindles,
as these kingpins need to be rebushed anyway.
Instead took out the grinder and notched clearance for the top.
Now the neighbors can rest easy,
the wheels attached and the car taken off jack stands!
I'll go through the cylinders to clean them up before install.
A crucial piece to the puzzle
was discovered after some midnight internet searching.
Actually this was found over a week ago,
and spurred the move to cure and paint the roof area.
I've learned to relax on shipping,
as the box will sit forever until needed.
Time for some real metal fabrication.
These gaps needed to be filled.
The old template trick and the pieces were cut with the now trusty band saw.
This is some thick steel to match the hinge piece installed years ago.
The idea is to strengthen the cowl area to the windshield, dash and door jamb.
Next was one of the last bits of rust repair on the body.
The lip had disintegrated long ago.
This piece was cool as it was a puzzle fit.
The little step slid into the gap,
making it much easier to weld.
Looking at these pictures,
I should have extended a bit higher,
as now the worst part is the best part.
The other side was easier,
as the gap was only half-inch or so.
To finally be at this stage is really surreal.
Remember it started like this...
And now it looks like this...
Looks like now I've got to fix the doors!
Not too high on the STD list...
Meanwhile the hood was also slowly transforming.
This is what it looked like last time I posted.
There will be long stretches of time,
as a plan forms.
To make this work the hood had to be cut into even more pieces.
The flat center spot was cut out,
and the two sides welded together to form a peak.
This also helped the fender to hood gap.
A trial fit with the hood top,
and that inch really helped with the flow.
At this point I really wanted to just fit the top and bottom and weld it up.
Control young grasshopper.
This was the time to make a structure for the hood.
Much easier with a nice open space from the top.
I was imagining crawling in the engine bay if I had rushed it.
A hood line was made out of some string and tape,
and with the last remaining hour of light,
a stiffener was formed out of some 5/16 SS rod.
Did I ever say that I'm a big fan of the metric system?
It is so easy to measure and cut not using fractions.
The numbers still seem arbitrary,
as I don't know how long 600 millimeters is by sight.
By 9pm the new spreader was welded to some quick-cut tabs.
It looks good in the dark.
This is a shot this morning.
I forgot to mention that the hood bottoms were bolted to the fenders and grill.
See how the new spreader pushes the hood to the fender near the cowl?
It will be easy (?) to stick on the hood top now...
My choice now is to use the original nose piece,
or modify the original and add the filler strips.
One thing that is interesting,
when the original nose is lined up,
the match point is almost 2.5 inches above the original cut line.
(black sharpie mark)
It seems that sliding the bottom half of the hood forward,
pie cut it at the same time,
even though there was no pie cut cut.
Trippy...
Until next time
TP
just to get it to look like every other profile shot!
 |
| 1940 ford coupe chopped channeled sectioned |
The first hurdle was really simple,
yet took forever to choose the long way or the hack way.
I went hack this time out of laziness.
 |
| f100 backing plates + round spindles |
Ford F100 brakes work easily on 42-48 square spindles,
but the round spindles are a little wide at the wheel cylinder.
 |
| spindle notch |
Really I should have swapped to the later square spindles,
as these kingpins need to be rebushed anyway.
Instead took out the grinder and notched clearance for the top.
 |
| ford f100 brake on round spindle |
Now the neighbors can rest easy,
the wheels attached and the car taken off jack stands!
I'll go through the cylinders to clean them up before install.
 |
| 1940 ford coupe chopped channeled sectioned |
A crucial piece to the puzzle
was discovered after some midnight internet searching.
 |
| windshield rubber |
Actually this was found over a week ago,
and spurred the move to cure and paint the roof area.
I've learned to relax on shipping,
as the box will sit forever until needed.
 |
| holey chit |
Time for some real metal fabrication.
These gaps needed to be filled.
 |
| template |
The old template trick and the pieces were cut with the now trusty band saw.
This is some thick steel to match the hinge piece installed years ago.
The idea is to strengthen the cowl area to the windshield, dash and door jamb.
 |
| fit |
Next was one of the last bits of rust repair on the body.
The lip had disintegrated long ago.
 |
| puzzle |
This piece was cool as it was a puzzle fit.
The little step slid into the gap,
making it much easier to weld.
 |
| slip fit |
Looking at these pictures,
I should have extended a bit higher,
as now the worst part is the best part.
 |
| rust repair |
The other side was easier,
as the gap was only half-inch or so.
 |
| steel |
To finally be at this stage is really surreal.
Remember it started like this...
 |
| tres huevos before |
And now it looks like this...
 |
| tres huevos after |
Looks like now I've got to fix the doors!
Not too high on the STD list...
 |
| primer |
Meanwhile the hood was also slowly transforming.
This is what it looked like last time I posted.
 |
| hood |
There will be long stretches of time,
as a plan forms.
To make this work the hood had to be cut into even more pieces.
 |
| halfie |
The flat center spot was cut out,
and the two sides welded together to form a peak.
This also helped the fender to hood gap.
 |
| peaked |
A trial fit with the hood top,
and that inch really helped with the flow.
At this point I really wanted to just fit the top and bottom and weld it up.
 |
| holey chit II |
Control young grasshopper.
This was the time to make a structure for the hood.
Much easier with a nice open space from the top.
I was imagining crawling in the engine bay if I had rushed it.
 |
| template II |
A hood line was made out of some string and tape,
and with the last remaining hour of light,
a stiffener was formed out of some 5/16 SS rod.
 |
| metric |
Did I ever say that I'm a big fan of the metric system?
It is so easy to measure and cut not using fractions.
The numbers still seem arbitrary,
as I don't know how long 600 millimeters is by sight.
 |
| dark night |
By 9pm the new spreader was welded to some quick-cut tabs.
It looks good in the dark.
 |
| ready |
This is a shot this morning.
I forgot to mention that the hood bottoms were bolted to the fenders and grill.
See how the new spreader pushes the hood to the fender near the cowl?
It will be easy (?) to stick on the hood top now...
 |
| nose |
My choice now is to use the original nose piece,
or modify the original and add the filler strips.
One thing that is interesting,
when the original nose is lined up,
the match point is almost 2.5 inches above the original cut line.
(black sharpie mark)
It seems that sliding the bottom half of the hood forward,
pie cut it at the same time,
even though there was no pie cut cut.
Trippy...
Until next time
TP
No comments:
Post a Comment