Showing posts with label fan. Show all posts

19 March 2013

mountains and mole hills

You guys are probably tired of the same front shot of the ford running gear,
so here's the tranny side of the 40 ford project.
To the trained eye,
a ton of little things have been done,
and I'm going to show you in way too extreme detail...
ford AOD tranny


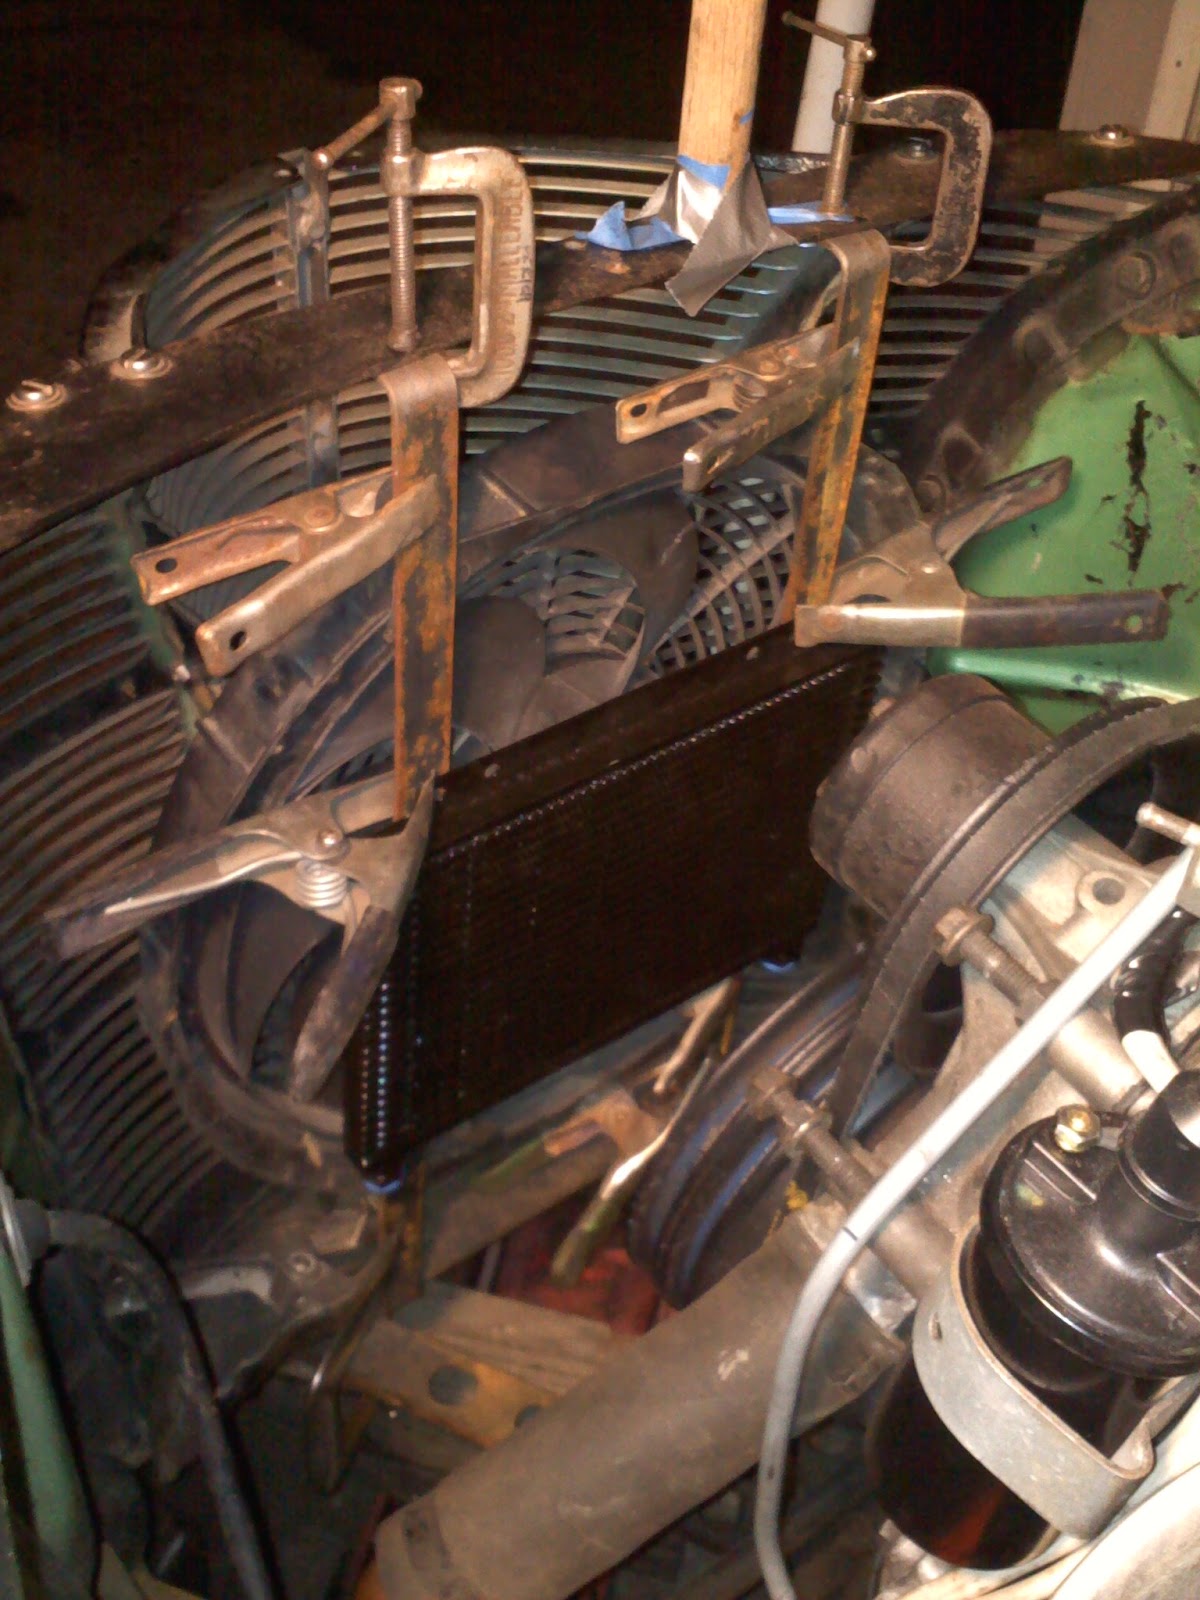
Last time I left you the tranny cooler & fan were all clamped up.
A couple changes and the brackets were drilled and tapped.
stool time with macey james perich


These skateboards are the new work bench.
You'll see what I mean in future posts.
mores stool time with MJP


After a couple quick tweaks,
the brackets were shined up and painted.
Everything looks good in flat black.
tranny cooler + electric fan assembly - 1940 ford


This better fit as it was mocked in and out a half dozen times,
along with the actual radiator.
I could barely wait for the paint to dry.
tru-cool lpd-4707 transmission cooler


The local auto parts store can't put enough stickers
on these dang painted steel lines.
Besides that they are rarely straight.
Surprised they don't have a shipping tube for them.
stickers


Tip - I've found the best way to remove stickers is not with your fingernail,
unless you don't mind the nail ripping.
Fortunately there are 10 of them.
The glue residue comes off easily with some wd-40 and a rag.
clean


I was even prepared with the big 3 special $8 tubing bender.
What a hunk of crap.
Long ago I had a similar one that worked half way decent,
but the tube slots were smooth not painted.
Regardless this thing was a waste of money for the 5/16" line.
worthless fuel & brake line bender


One thing that shouldn't be working still is this harbor freight flare kit.
I'm going to brag that I've never actually bought anything from harbor freight,
however I have bought used stuff that other people have bought from there!
This was supposed to be a one job tool,
and it has lasted through many many ends.
Funny cause I've got a nice one for metric that I've never used.
harbor freight's bulletproof double flare tool


After resorting to the tried and true hand bending method,
the transmission lines were completed in 2-piece sets.
If that cheeseball tubing bender hadn't ruined the 4th line,
I could have saved myself the trip to the parts store.
3 out of 4


The lines were routed down below the radiator,
than alongside the oil pan underneath the starter.
It was the most logical way.
I'm thinking of making some kind of belt guard,
just to protect the lines.
tranny cooler mounting


It would have been much easier going bosozoku style,
with the cooler in front of the bumper.
bosozoku transmission cooler
ripped pic - speedhunters


It was an easy choice not to as I can't afford those steel braided lines!
I did upgrade from a freebie hose-barb tube style cooler,
to a tru-cool stacked plate cooler with threaded inserts.
It's really tiny but is rated at 16000 BTU.
I'm hoping the hard line fittings will stop any pesky leaks.
line routing


While my hands were in the mood,
I decided to redo the fuel line as well.
Now it goes all the way to the old feeder line,
which is next to the transmission.
I'm betting the looseness of the length,
will be enough to not need rubber hose.
fuel line


There's only a few things to do to start the engine -
- oil, hot coil wire, cap radiator holes, coolant...
actually there are too many things to just rush through it.
lincoln AOD TV cable


So instead I pulled out one of the bigger obstacles.
This is the original Lincoln Throttle Valve (TV) cable
that came with the engine and transmission.
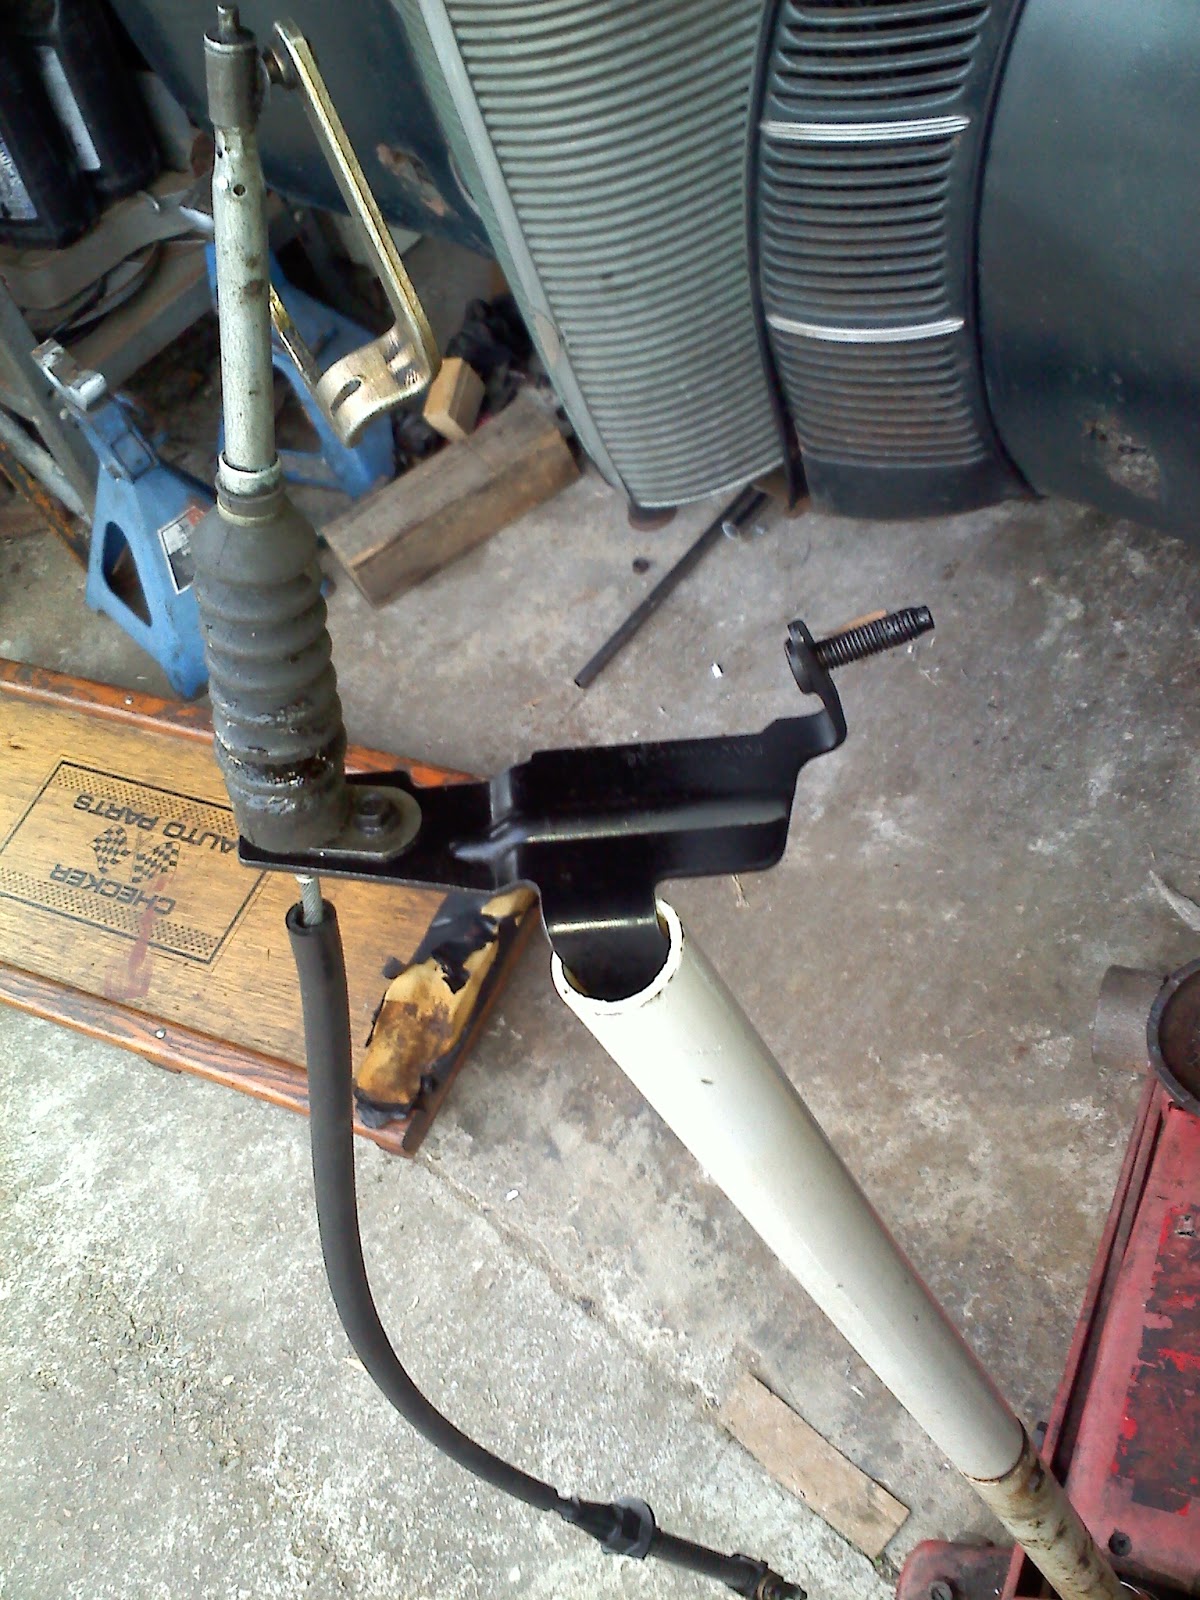
modified FORD TV cable


The housing was modified a little just to clean it up.
As you can see the length is basically perfect to the carburetor.
The tricky part is figuring out how to attach it and make it work!
ford AOD TV cable to carburetor


If you look closely,
there are two gold bolts on the intake.
The next project is making a bracket that attaches the line to those bolts.
Than the throttle needs to be modified to hold the cable end.
Many will think it is easier to use the Lokar TV cable,
but the Ford one is a really clean easy to adjust design.
It is worth the effort.
Cross your fingers for me!

TP

16 March 2013

dishwasher

Ok this is for all the gearhead readers out of the fortunate 32,
that are wondering what the heck is going on with all the talk of stereos,
kids and what-not.
I'll admit it's tricky to write one of these blogs if you are too focused.
Since I'm basically screaming into the wind here,
you guys get an unfiltered look into any shiny thing that catches my eye!
1940 ford coupe -  project june bug


Last week I wrote about my epic progress with the steering u-joint.
A truly incredible task on its own in terms of feebleness.
It made me realize I'd better get my a$$ in gear!
modifying motor mount


The problem I whined about last week
was the amount of unexciting projects.
It's like washing silverware when doing the dishes,
lots of them but they don't take up enough space,
so it doesn't look like much was actually done,
although it takes more time to fill the sink,
than it does one big ole pot.

On a side note that brings up an interesting tangent.
I'm the head dishwasher of the family,
as that is what keeps my hands so soft.
Yeah.
Well I noticed that even when our sink is totally full,
like it is every day,
I'll usually start with the utensils.
(the exact opposite of what I like to do on the car projects!)
and I'll use that rinse water to soften up all the dried egg
or whatever it is that is on the plates and bowls.
Usually I'll leave the big pot or mixing bowl,
as I use that to hold all the soapy water.
However,
when the wife does the dishes,
she'll do the exact opposite,
and leave all the silverware in the sink.
I guess that's why I'm the dishwasher!
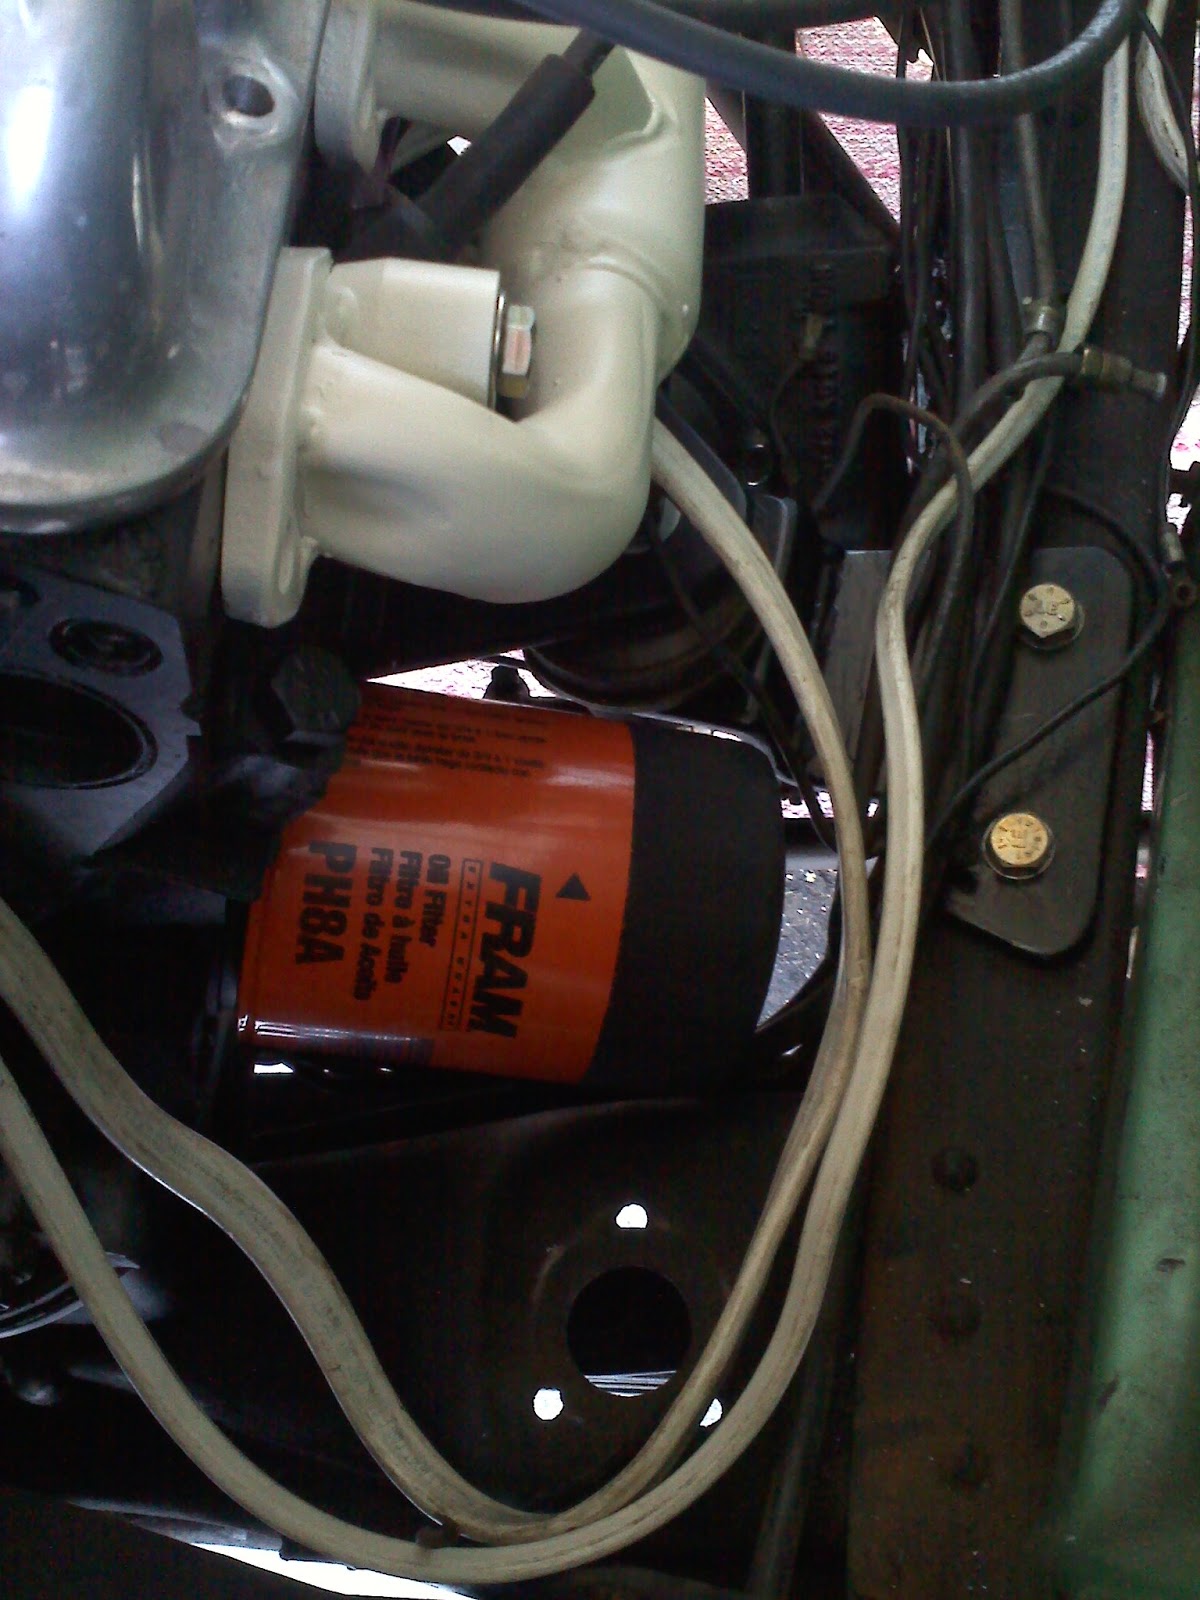
302 oil filter notch


Wow now wasn't that a tangent!
Well one of the things on my STD list was to notch the engine mount,
as the oil filter didn't quite fit.
A couple passes with the grinder and now the engine can be filled with oil.
early ford starter wiring


Next on the list was figuring out how to wire up the newer starter.
There is a solenoid attached to the 5.0 starter,
unlike the flathead starter which needs a remote solenoid.
newer starter with older ford solenoid


At first I thought there was no need for the original starter solenoid.
With the help of the internet the correct wiring diagram was found,
but I'm not going to rip it off and post it on here,
instead I'll replace it with words...

Only one new wire was needed,
going from the temporary hot side to the new starter solenoid.
The big hot actually goes to the permanent hot side of the old solenoid,
so the starter is always hot.
This made the wiring easy as all the hot jumpers didn't have to be moved.
I'll be cleaning this up with some zip ties later on!
It was a big relief when the engine actually turned over with the push of the button,
and didn't continue turning after I let it off.
vintage soldering set


Next thing was to button up the wiring.
This was like hitting the brick wall on the STD list.
There's only 7 wires or 14 ends left,
but it took ridiculously long to visualize.
One of the issues was using this scrap boat multi-wire,
instead of running separate strands.
As you can see I had a habit of running only black wire,
so it's impossible to tell which wire is which later on.
The new white wire made it so simple,
my mind was trying to make it more confusing than it really was.
All the ends were soldered and heat shrinked,
and I'll zip tie everything once I know it works.
90% finished


The only wire I need now,
is the hot that joins the ignition, red coil wire, and voltage regulator.
I've got a series of toggle switches instead of a key ignition,
so that will give me a chance to clean up the dash wiring.
radiator hose scraps


Another exciting thing on my list was the radiator hoses.
I piled up all the old hoses,
and found some copper reducers to do some cut and paste.
flathead radiator hoses


The reducers make it easy to fit hard to find hoses.
This method has worked on the RPU flathead without a hitch.
1940 ford 302


It's tough to see but the hoses are all fit without the hose clamps.
I got lucky having that donor pile.
I'll still need to plug the extra radiator holes.

If you look closely,
there is now a fuel line to the carburetor!
I originally planned to u-turn it to go to the back of the engine,
and again I over-thought that layout.
A scrap tube I had saved from the chief rebuild (2 years ago!)
was bent in about 5 minutes,
and now I'm not sure why I was thinking doing it any other way.
There still needs to be some hose to connect the existing line.
transmission cooler & fan mock up


Tonight I started on the fan and transmission cooler bracketry.
I want them independently mounted so the radiator will be easier to remove,
without having to cut the zip tie mounts which make holes in the radiator fins.
A little preplanning in case I have problems.

If I'm lucky this will be finished tomorrow.
I'd love to fill it with fluids and start it up!

TP

07 March 2013

daisy chain

Our ancient MAC MINI computer was acting up again,
so it was time to give it the bi-annual tune-up.
new computer shelf


Computers are one of the few things that we buy new,
and then run into the ground.
This is the first intel version with 1.5 ghz solo chip,
still working since 2006.
mac mini 1.5 ghz solo


The past few weeks the computer was screaming for attention,
the fan was working way more than usual,
as it usually shouldn't even be on.
The heat was making it a little glitchy.
The dust bunny was a tell-tale sign of the problem.
mac mini air vents


The only way to cripple this otherwise bulletproof design,
is by putting the air intake vents on the bottom of the computer.
Sure enough dust was blocking the slotted holes.
That's how to engineer in planned obsolescence.
clogged mac mini air vents


A few minutes with the vacuum and a toothpick,
and the computer was like brand new.
clean mac mini air vents


In an effort to squeeze the most time out of our little workhorse,
it deserved a little dust proof throne.
Using the perfect piece of scrap wood from the refrigerator install...
scrap


...a quick shelf was whipped out.
computer shelf


The inevitable rattlecan paint job to make it blend in a bit...
custom computer shelf


This was the mess the computer had lived in for years,
sitting on the bottom of the shelf.
It is surprising how much dust accumulates back there.
wired


I've got a slew of external hard drives,
and they are all daisy chained together.
daisy chained hard drives


***************************************************


Reconstruction - Jerry Garcia - Dear Prudence 7-8-79
A definitely chill version...
...horns, hammond and the wailing guitar creeps up on ya.

***************************************************

This idea was years in the making,
and took all of 45 minutes to finish,
and it looks like it did.
capo di monte red roses


We were so excited with the new clean space,
the perfect spot to showcase our treasures.
chinaman cart puller


At this point I didn't realize we had so many treasures.
94 carburetor core


The choices were endless.
USS Philippine Sea ash tray


Not much of a smoker or cigar chewer anymore.
Who is these days?
rabbit cage


The kids helped out in an effort to clean there own clutter.
piggy bank


I'm not sure where this stuff was coming from.
change stash jar


Finally some more realistic choices.
This change jar gets robbed of it's quarters all the time.
ISAF NATO-OTAN mug


Finally the most logical choice appeared.
The daily tea cup from Ken.

Fortunately the computer is back into play,
silent and cool.
Maybe we can get another couple years out of it...

TP

21 February 2013

hot rod amplifier

Last weeks adventure with all that McIntosh gear
gave me the not-needed distraction to pull out
my own MC2300 that I grabbed a couple months back.
It has been quietly waiting,
stashed behind a speaker in the living room.
A great place for a 130+ pound amplifier.
McIntosh MC2300


Here's a refresher...
perich brothers (and sister): basking in the blue glow
***************************************

Oldies Month #12
Otis Redding - Hard To Handle

***************************************

Like most deals I get,
this one needed some fixings.

The needle was broken on the left meter.
A NOS replacement was found on ebay,
but never the time to swap it out.
The light so-cal rains were a perfect excuse.
McIntosh MC-2300 Amplifier


After seeing Sean rip his amp apart,
I figured how bad could it be.
Unlike stereo receivers
which are very delicate in there intricate layers - tuner/amp/preamp,
the MC-2300 is built to repair.
It's really the hot rod of vintage solid state amplifiers.
Everything is held together by screws or machine screws,
no fragile glass or plastic - all aluminum or sheetmetal.
Other than remembering where the wires go,
the layout is very accessible.
MC 2300 minor repair


The front plate could be partially removed without taking knobs off.
There had been some definite hack work done in the past.
The light fixture had some custom hacketry added,
which had perplexed me earlier.
I figured out that the light mounting bolts on the meters had broken off,
and so the tech had rigged it up.
mc2300 meters


The meter swap could have been a quick fix,
while also solving the light mounting problem.
Out of curiosity I took apart the old meter.
busted McIntosh 124-018 meter


Lo and behold the needle was laying inside the housing.
Better yet the needle wasn't broken,
and wasn't a needle but actually a straw or tube.
It easily slid back over the actual gauge pin.
Guess I'll save the NOS meter for later!
Still need to get that light assembly solidly mounted.
fixed McIntosh 124-018 meter


The next issue was the driver cards.
Something wasn't quite right with the sound,
and the heat sinks wouldn't heat up evenly.
At first I thought it was some toasted transistors,
but when the cards switched sides,
the unevenness would follow.

Basically if you look at those 8 heat sinks,
the 2nd and 3rd would be hot but not the 1st and 4th,
then the 5th and 8th would be hot,
but not the 6th and 7th.
mc2300 guts


The driver cards belong in those 2 empty slots,
there between the autoformers and heat sinks.
Like I said this thing is built to repair.

Late last year I had sent them to the McIntosh guru Terry DeWick,
but he's so back logged they're still there.
Fortunately Sean let me borrow a couple in the meantime.
1Y McIntosh MC2300 driver cards


After a quick install,
the old amp was back in business.
I'm no electrical technician,
but it seemed like it needed some juice to burn the cobwebs out.
I swapped the cards back and forth,
to do that heat sink test again,
and after a couple hours just idling and some mid-level playback
the amp has really come back to life.
Like all 300 watts per channel have been unlocked.
What can I expect from 40 year old capacitors and transistors!
I'll need to do some research on upgrading those later on.
test system - sansui 9090 + MC2300 + 4-JBL 4311


Now it is hooked up to the computer using the sansui 9090 as a preamp.
I also hooked up all 4 speakers to draw more power out of the amp,
and it seems to like it.
There is a row of ohm connectors ( 0.5/1/2/4/8/16) in the back,
with the wires hooked up parallel on the 4 ohm post.

Resistance = (Speaker A x Speaker B) / (Speaker A + Speaker B)

and 8x8ohm/8+8ohm = 4ohm
However some say these JBL 4311's are closer to 5 ohm,
so that would be 5x5ohm/5+5ohm = 2.5.
MC 2300 backside


Yeah this stuff gets a little technical!
One thing I gotta say is when this thing is semi-cranked,
the heat builds up in there,
and those 2 fans kick in.
Sure there's no sound difference,
it's just plain cool!
inside MC-2300


I will say this thing has a really sweet sound.
Most say there's a warm tone and that would be a good term.
While it's not necessarily louder than the 110 watt 9090,
there is a bigger or fuller sound, like getting hit by a good size wave.
Also I bet this could handle another pair of speakers without a sweat.

 Anyway let's see how long this thing can last in the middle of the walkway!

 TP