29 October 2013

no excuse

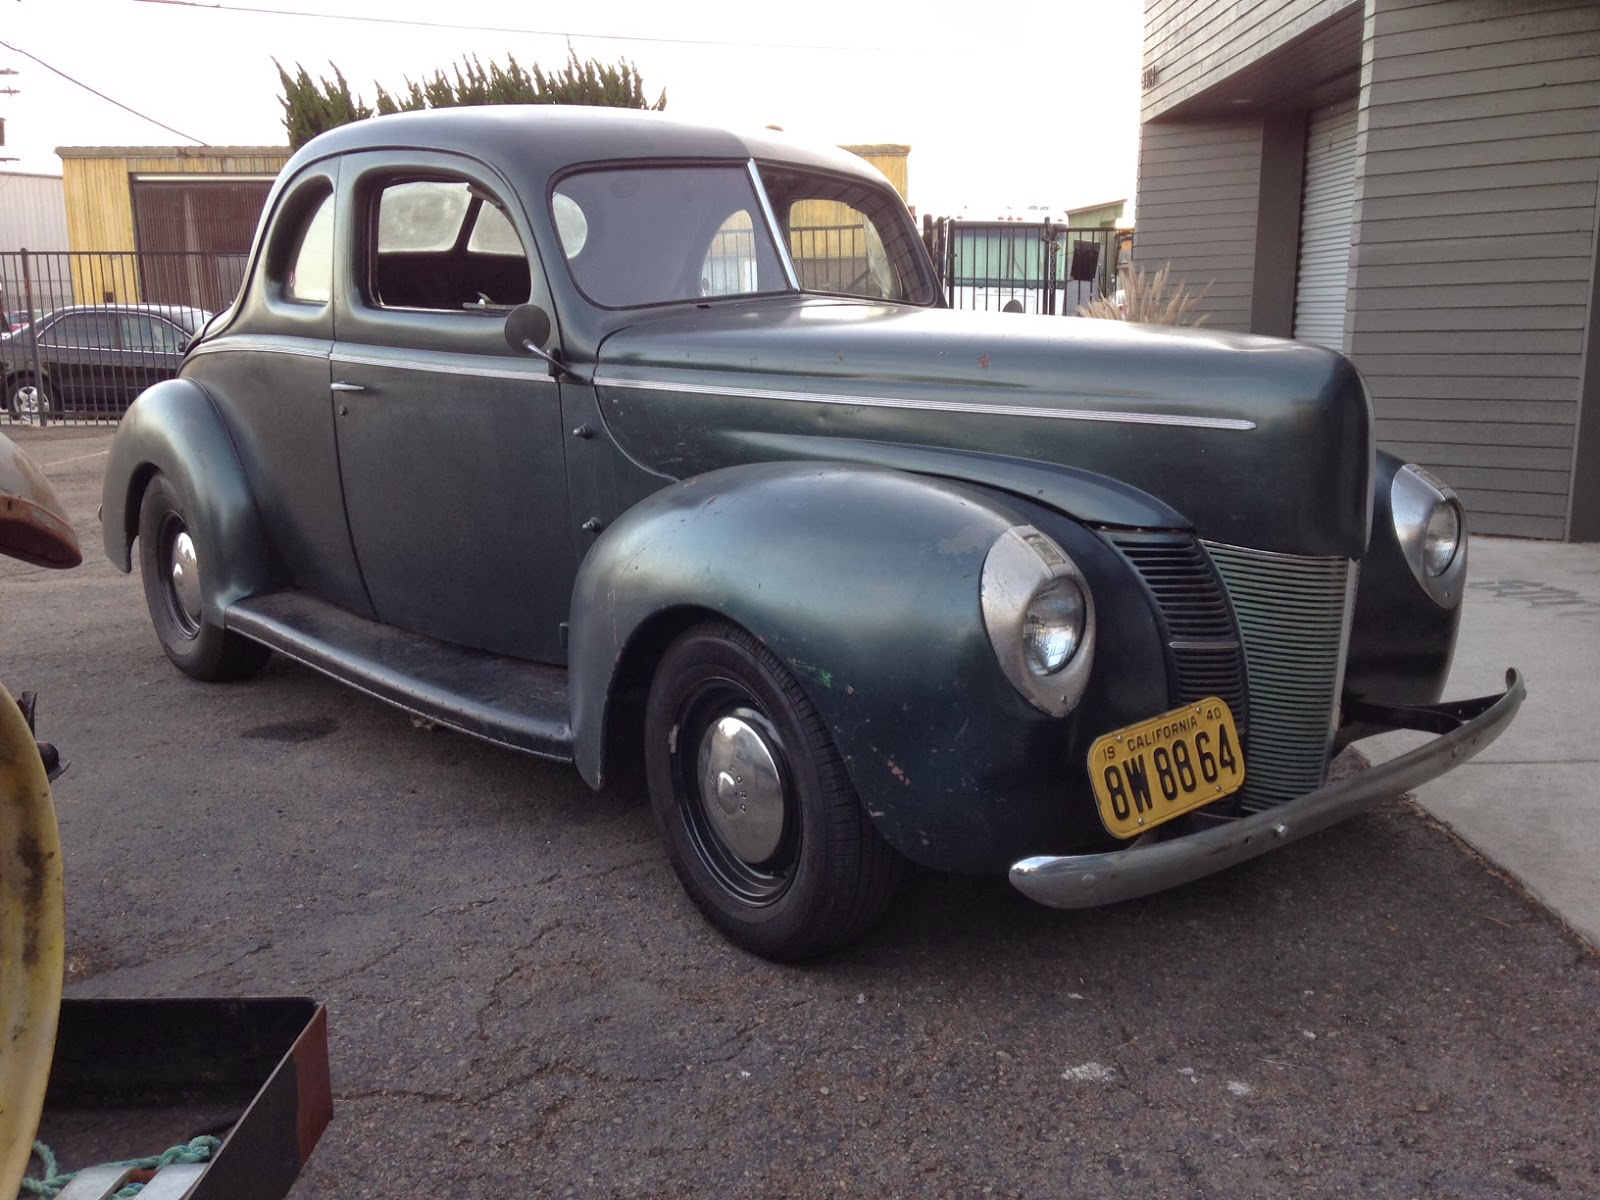
After almost 6 months a bummer event shrouded by rain
has finally coerced me into making space in the garage for 2 cars.
1940 ford coupe


The first couple days parked in the alley spot I had a bit of concern.
Then the week went by,
and a month later that changed more to guilt.
Waking up from wet foggy nights that left the 70+ year old steel covered in dew,
just leaves that "WTF I should know better" feeling.
With no windows I am thankful it wasn't tampered with,
I've got too much trust in the local hood rats.
1940 ford coupe - moonshiner


So what is this bummer event you wonder.
If I could blame it on an old neighbor lady or maybe the trash truck,
it would be so much better.
Instead,
I'll admit that I ran into my own car.
Yeah.
Hack.
holey chit


Here it goes.
I was unloading the van,
and swiped the fender on the way out.
Simple as that.
Jakob was in the car,
and we saw the 40 shake back and forth.
He's observed many of my dumba$$ moves.
Like he knows now not to use a torch to burn the weeds...
dent of shame


The new dent was a sign that maybe I've got to slow down.
On the good side,
this 40 looks way better in these little pictures than it does up close.
The body is really nice,
but the fenders are full of bumps and bruises from the old hot rod days in Perris.
No it's not an excuse,
I'm just trying to shed a little light on this darkness!
stool time


Over the weekend I had to take care of it.
At least smooth it out a little.
roughed


The majority of the bowl popped right out,
using only a simple rounded rubber mallet.
As usual the surrounding circle had multiple mini craters.
A little hammer and dollying and it was a little better.
patina


Over 7 years ago I sprayed the car with a case of rattlecan green,
right over the 60's metallic lime green.
If you look closely I barely sanded the surface,
whatever I couldn't do to save that old paint.
It's so cool to see the actual history of the car.
A friend Detonator Dave calls this "auto-archeology".
auto-archeology


I was running out of time,
and without removing the front wheel,
there was no way to get good hammer access.
Good excuse for a hack job!
I'll have to sand this to bare steel,
and get at it with the shrinking disk and more hammerwork later.
flat black


This is where I really screwed up.
I rarely use masking tape when spraying rattlecan.
The one time I do,
and the tape rips off the original paint,
leaving a ring of bare steel.
Effin A!
stool time


At this point I couldn't be late.
A quick sand and spray,
and the car was wedged in as far as possible.
1940 ford coupe coop


I wish I'd taken the earlier garage shot,
when the rear 2' of the green 40 was sticking out of the garage door.
It did rain that evening!
1940 ford coupes


Now both 40's are where they belong,
under a proper cover.
I'll probably swap the RPU to the garage as it is shorter.
There is basically no room with two full fendered cars.

Anyway always something fun going on...

TP

26 October 2013

scrap yard engineering

Ok finally some time to relieve some backed up posts.
What do you guys think about this?
1931 model a coupe project


Well this post isn't about the coupe,
it's really about the trailer.
We'll talk about the potential hot rod later.
ford life


As the story goes,
a friend Aaron and I found this model A project with the help of Mario,
who at this point is regretting that he had passed it up.
To get the coupe home,
a bitchin single axle tilt bed car hauler was found the same day on craigslist.
Gotta love how fast things move with a little money.
I've always wanted one of these.
tilt


The problem was the trailer was made to be pulled by a mini-truck.
Our van has a 22" high ball,
which left trailer scrapes from here to Chula Vista.
chopping block


The first project at Tom's Yard of Fun was a simple mechanical mess.
Now it was time to cut and grind some thick steel.
low tow


The easiest solution would have been to make or buy a deep drop hitch.
Why go the easy route though when there's a torch and scrap lying around.
metal surgery


Before I heard any reservations or restrictions,
the hitch was dissected to the bare essentials.
scrap engineering


I dug up into the dark depths of past projects for quality steel scrap.
Those 4" channel pieces were used to make the center window sheetmetal
on the tres huevos coupe.
A picture may be edited in at a later date just for posterity.
trippy engineering


I'm not sure if it was the blazing heat or the sheer fun of hot work,
as the project became continually more intricate.
Ship like snake-holes were made to hide the holey-chit chains.
black


I'll do another hole in that front angled piece,
so the electrical plug can have a place to sneak out.
Everything looks better in satin black,
but now the chains needed a little shelf.
asymmetrical TeePee


Expanded metal was cut to fit just right.
At this point I should have continued the shelf all the way back.
A place to keep straps and junk.
Really how much can be done in one day?
Just kidding.
This is about a weeks worth of short bursts.
high and mighty


Now time for the back section.
tweaker style


The cheesy railings and fenders were left out for the scrappers.
clean


A section of 1/2" pipe was welded to the top,
helping to straighten out the wobbly looking sides.
The other side had a cut out section of plate that was also replaced.
cleaner


The coupe project came with an extra rear fender.
Now we really need a drivers side fender for the trailer.
It's resting on the tire wish it could be mounted this low!
tubular


The pipe was bent to finish off the back,
and a couple rattlecans blended everything together.
1960 or 2013?


The trailer will still have a mean tilt,
as the total raise was only 4".
At that height the trailer will work on a mid-size truck too.
Really I should have made it level to the van or the majority of people I know,
since we all have oversized rigs!
scrapyard engineering


I'll also weld up some loops to hook the chains too.
Next up the coupe story!

TP

24 October 2013

will work for beer

Hey guys excuse this week long intermission!
I've been having some technical difficulties,
the new iphone 5c is more powerful than our 6 year old mac mini,
and I'm still stuck on the droid way of doing things.
Not to fret you'll be overloaded with chit pretty quick.
pinky


You know how that little hourglass or pinwheel thing spins on the screen,
when you're the computer is buffering?
If you stare long enough at these tiller wheels,
they'll start doing that.
broke


Stay tuned!

TP

17 October 2013

mechanic or welder?

I posted earlier about my fingers losing battle
with the car door over the weekend.
By Tuesday it had swelled up like a skin balloon.
Of course this weeks project was hard to reach mechanical chit,
and throughout the day each little tap or rub tested the pain threshold.
drillium


It had been over 10 years since I had a good finger smash,
and I remember poking a hole in the fingernail to relieve the pressure.
A medical consultant friend Aaron confirmed this was the thing to do.
something's wrong with your finger dad! - Macey 2013


Obviously its been a couple days now,
but I've found out that a many friends have done the same thing,
and there are two variations on what to do.
It seems to go with my theory of the workingman's core brain default -
mechanic vs welder.
There's more than one way to skin a cat,
and usually people will pick the one they're more comfortable with.
I was surprised that half my friends would use a drill bit,
and the other half would use a hot pin.
This is a hotly contested debate,
and the only conclusion is to agree to disagree.
Personally I think the drill bit technique is a bit sadistic,
as it takes pressure to push the drill bit into the nail.
Why add more pain?

This one's for Steve and Keven...
"How to - drain a subungual hematoma",
that's "how to drain a smashed throbbing finger!"
chillin


First off is to clear enough room on the dinner table.
If the kids haven't finished eating,
than they should have eaten earlier.

Dig out an ice cube,
and hold it on top of the nail.
This will numb it a bit although this is only for show,
there is very little if any nerve endings in the bubble of blood.
Find a candle and a larger safety pin.
The safety pin won't heat up and burn your finger when holding it.
subungual hematoma


Here you can see the comparison.
Aaron said the nail will most likely fall off,
as the suction has already been broken by
hot pin


I couldn't find a larger safety pin,
so this one would have to do.
It took a couple reheats to melt out a good hole.
A slow circular motion will keep the pin from sticking.
poking hole in smashed finger


Everyone says there's a geyser of blood,
but a face shield isn't necessary.
Mine actually made a light whistle.
draining a blood pocket


The relief was instant.
There was no pain from the hot pin,
the blood cools it off so fast.
poking another hole


I couldn't stop and made a total of 3 holes.
Make sure to squeeze the blood out,
you can see it through the transparent nail.
squeeze


Special thanks to Jaxon for taking so many pictures!
relief


The size difference is obvious in this side shot.
sangre


I was able to squeeze almost all the blood out.
Pushing the finger down onto the table,
keeps enough pressure to not let air seep back in.
After a couple minutes it'll seal up.
ahhh...


Try it you'll like it!

TP

16 October 2013

how to - play ball

Every cool picture has a story.
Here goes...how to modify a ford front suspension in 2 hours...
1940 ford coupe - industrial sunset


This past sunday I had a mission,
and smashing my fingers wasn't gonna stop me.
work truck


All the necessary tools loaded up,
and off to the yard we go.
No wonder they used these 40's as moonshiners!
operating room


The problem arose from the axle sectioning done last year,
which positioned the pivot locator ball 3/8" farther back.
This created a worse problem of pushing the axle forward,
only a paper width away from the front crossmember.
At stops it would make a light knocking sound.
Sounds safe huh!
the problem


Back in the 60's someone had modified a later '46ish set of radius rods,
the type with the swooshy curve,
to fit the frame.
If you look closely you'll see that gobbly extension the ball is on.
the solution


Instead of re-cutting at that extension scar,
which has lasted 6 years of driving on my watch,
someone somewhere had mentioned rewelding the actual ball.
This seemed much easier,
no triangulation issues just one fat weld.
fun at work


It always boils down to me welding underneath the car,
lying on my back,
an hour before sundown.
Another smart idea here is to use cardboard as a creeper/pad.
Hmm is he joking right now?
crude but effective


At least a dozen short passes with the stick welder,
a ton of hammering to simulate a forging process,
and the ball was set in place.
like a glove


The mate was perfect with the rubber cover,
and hey I'd make it home before dark!
1940 ford coupe - resto-rod


I think this picture was taken before the operation,
but it doesn't matter.
The wheel position was about the same.
Most importantly that familiar clicking sound had disappeared.
On to the next project!

TP