Showing posts with label holey chit. Show all posts

19 November 2018

The screech

It's been 4-5 years 
since wedging the 302/5.0
into the green 40.
Long enough I can't pinpoint within a year!!
Holey chit...
This time period has been a battle.
Long term readers may remember,
custom brackets were fabbed up
to fit in a mopar alternator.
I had mistakenly bought the newer regulator type,
not the old points style,
which is larger and uglier than the early 60's radial housing.
From a distance still looks better than a ford or chevy.
The mistake ended up being the correct choice,
as a '76-'78 distributor was modified with an 80's Chevy electronic ignition module,
which pairs up best with the higher output
and the solid state regulator.
"Where's the battle?" you ask.
The battle emanated 
from an occasional piercing belt screech.
Over the years I've changed the alignment,
at least 3 different times.
The main bracket was off a hair,
long studs allowed adjustment as well,
and a new belts would be quiet til they weren't.
The temporary fix was having extra belts,
about one a year.
Was it 5 or 6?
The permanent solution was so easy
it's embarrassing to admit.
Basically the little inside bracket would pivot under force,
allowing the alternator to swing crooked,
resulting in el screecho.
All that was needed,
was a second hole,
which wouldn't allow the twist.
Less than 2 hours total time,
lifted a half decade weight.
Doh...
Now that we had a solid running rig,
the goal was to make it a snow car.
After months and years of searching,
a budget trac-loc/posi/limited slip center 
was scored on eBay.
The 8" rear had a street perfect 3.00 ratio,
so I was picky to not want dragstrip gearing.
Since Jaxon was back from his summer so-cal stay,
he was volunteered to focus all those years 
of push-ups and junk moving,
installing his first pumpkin.
Ahhh child labor has its benefits.
The gamble on an original 70's unit
seemed like a mistake the first.
Clunk ...clunk...clunk...
until oil additive and figure 8's 
finally soaked in.
The difference was significant.
Maybe no chains this year,
I found some old studded tires that look fun.
Now we're ready for winter!
Okay maybe windshield wipers 
and door windows would be nice...
TP

04 November 2018

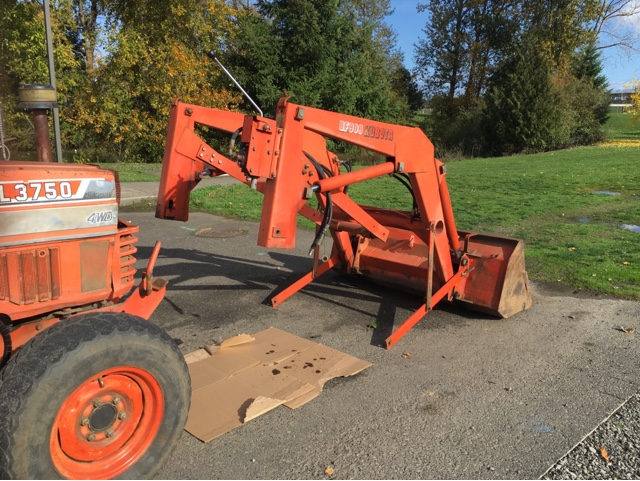
Splitting a kubota L3750 tractor and BF900 front loader

Holey Chit!!
It's been almost 3 months...
Let's not waste any more time!!
Two posts ago I wrote about this tractor.
Since then a half day was spent on it
to get the steering working.
We were planning on using it to pull an aerator,
the thing that makes holes in grass fields.
It didn't take long,
one weekend,
before the guys busted it yet again.
I realized at that moment,
my job here at PIR is fixing wounded soldiers,
sending them back on the battlefield 
to fight against hack equipment operators.
My coworkers are an interesting bunch,
good guys just not mechanical.
I've had to show them what a temperature gauge does,
how to read an oil dipstick,
why not to put gas in a diesel mower,
how to drive a stick...
Yes.
These are the guys using our equipment!
It reminded me of an old friend that was a movie set painter.
He'd spend weeks/days/hours building and painting,
they'd shoot the scene(s),
and tear apart the set the next day.
Sadly frustrating.
The carrot on the stick 
is the check every 2 weeks,
and not having to pay for parts.
That's enough to overcome my personal issues!!
That fateful weekend resulted in a burnt out clutch.
It was running so good too.
To replace the clutch,
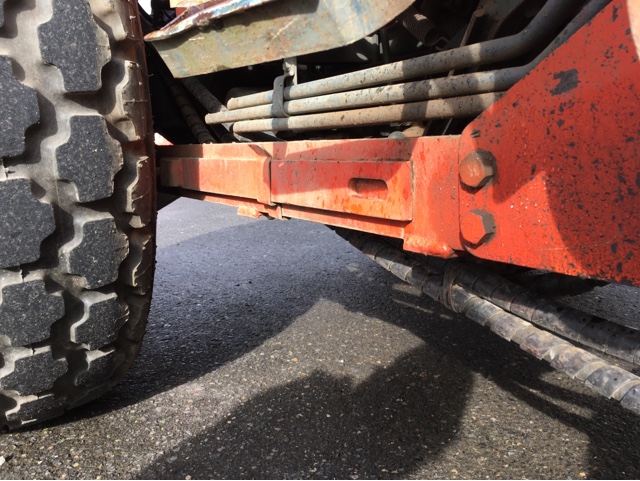
the front loader needs to be removed,
then the tractor is split in two.
Sounds like fun!!
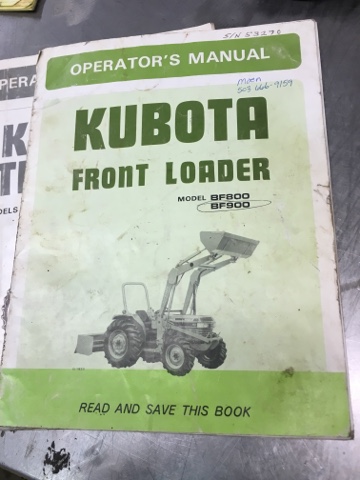
Before the misplaced manual was found,
I watched videos and read forums on
"How to remove a front loader from a tractor".
Not surprising,
a ton of videos on the newer idiot-proof machinery,
with kick-stands that are permanently hinged.
No info on tinker-toy engineering from the  1980's.
Yes,
this post is for you internet mechanics.
Hopefully you find it on your Google searches!!
This procedure took two of us about an hour,
including not fully reading the manual.
(I just needed the one assembled picture
to steer me in the right direction.)
We had added the two vertical arms too early,
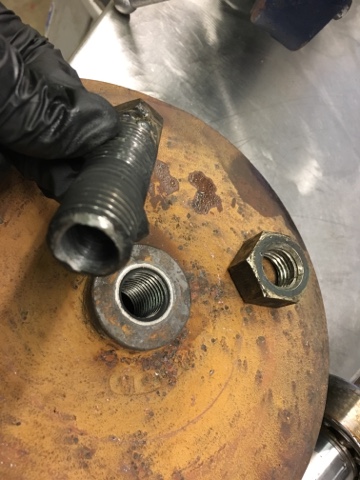
and the wedge pins didn't pop out easily.
Hey I didn't grow up on a farm...
I'm new to this tractor game!!
The next time will maybe take 20 minutes.
I'm hoping pictures are worth a thousand words,
cause I'm not writing a play by play...
But this guy did years ago!
Just one picture woulda been nice!
Thanks J.D.!!
So yea here's the start to hopefully more regular posting.
The race season was so crazy here,
lotsa pic-stories comin up,
and I got a couple more projects...
there's a bunch to write about.
Until next time...
TP

30 April 2018

Toro 580D - pushing the limits

After a brief hiatus,
looks like I can finally write again!

The mowing season is starting.
Night temps are in the 40's,
so grass is growing,
however the ground is a bit wet.

Mowing is like mud bogging and off-roading.
This Toro 580D is a 4wd unit,
with monster front tires,
one of the few capable machines for this.

This bank runs alongside the entrance.
It's got a good slope,
which the mower travels on sideways.
I tried to cut to the top,
but the 5000 lb mower didn't like it.
The grass was tall enough to bog the engine,
then with both wings down,
the left tire started digging in.
Holey Chit!!
Not good to be stuck up there!

Lifting the left wing gave some traction,
but turned the body slightly up the hill.
Not a good feeling!
On a bank you're not sposta go in reverse,
but there weren't too many options.
Backing up straightened the machine out,
but the 4wd only plowed forward a little bit,
until the tires lost their grip,
and the back end started sliding down the hill!
Holey Double Chit!!

It was like slow motion.
Somehow I balanced the wings,
and maneuvered down the slope.
It was crazy but fun.
No soiling of the pants!

I checked the machine,
then continued on like nothing happened...
The dirt scar will be there for a while!
So far I've been stuck 3x this year,
bringing my grand total to 12,
which means a couple dozen close calls.
Now I should know not get too close to downhill fences,
and I should know when there's a mud bog.
The problem is trying to get that last tuft of tall grass.
It's like the bait of a quicksand trap.
Fortunately getting winched out is part of the job!
This one was technically in December,
in a spot on the border of our responsibility line.

I was going round and round,
closer to this sharp incline,
and got too cocky.
Whabamp!!
I thought "speed" or momentum would get me through,
but all it did was jack the front wheels above the dirt.

Good times!!

TP

21 March 2018

Whoops

Heres a recent whoops...
A perfect candidate 
for the good ole bait and switch technique.
Can you spot what happened in this picture?
At lunch break I parked the silver bullet truck
in the way of our much larger flatbed.
Holey chit!!
Well what else was I gonna do the next day?
The guys keep me busy that's for sure.
Shops got some fun tools,
although they need work to work.
The portapower was dry of oil.
Very handy if rarely used tool.
The tailight surround had limited access,
a little heat and hammering was enough
to at least zip tie the light back in.
The bait and switch was repainting
the bright blue banding reel.
Unsurprisingly the dent is barely noticed!
TP

24 February 2018

Bomba

Holey Chit!!
It's been almost 3 months!!!
Had a few hiccups this year,
writing had some difficulty flowing.
However pics and projects haven't stopped.
Let's start with a semi-recent work project...
This was a super-leaky and almost seized 
berkeley water pump.
A dozen years ago they simply replaced it,
but the not-too-local shop wanted almost $2800!!
I'm sure a rebuild woulda been cheaper,
if it wasn't for the "lets hit it with a hammer to loosen it" situation.
The broken packing gland/housing is cast iron.
I tried stick welding with the special rod,
but access was limited.

The easiest solution was brazing.
Not the prettiest but it's dang strong.
The previous dissassembly was a pita.
I ended up cutting the shaft in pieces,
welded a bolt to the impeller section,
and used an impact gun to twist it out.
I couldn't resist some rattlecan wonder.
At the time it was in the 30's,
so the stockroom was heated up as a spray booth.
The assembly was a piece of cake.
The new shaft is stainless steel,
so it should last forever compared to the original.
The rebuild kit was about $600,
after time and materials,
this saved over half the rebuild estimate.
And I was able to fix a broken impact gun
while the paint dried.
The guys at work will never get new equipment!
The worst was yet to come.
Before installation,
a 5-gallon bucket of rust was scooped out of the tank.
I was trying to get out of this type of work,
by going to a cushy city job.
Oh well!
The plate shield had deteriorated to dust.
I hammered out a bolt-in screen,
hopefully this keeps the pump healthy.
The tank already had some rust through holes,
the thickness probably half in most places.
An experiment with a couple boat zincs
may stall any electrolysis from the mineral rich well water.
All wrapped up!
Let's see how long it lasts...
More soon!
TP