Like I said in the last post,
I had a brief realization that helped me to organize my shop situation.
This BMW project started out as a
"whatever I could do by the end of the month" project,
but now it has entered into the second part of the month.
There has been more work than expected,
or maybe it just took alot longer than I had thought.
So I decided to get the car back together.
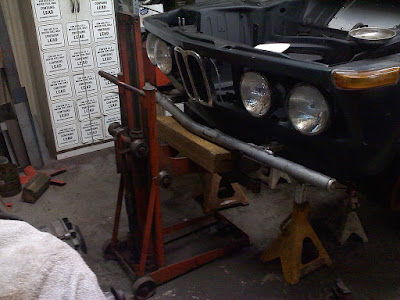
First off I found out that the new aluminum bumper was strong enough to hold up the car!
 |
| bumper jack |
I had removed the front end since it was only 6 big bolts and 10 little ones,
making it alot easier to clean.
Unfortunately I had found out the reason for a light shimmy at a certain speed.
 |
| watch the center link tie rod end |
 |
| little loose! |
A quick search found the part ranging from $60 on up.
All the other tie rod ends and balljoints were pretty tight,
and since this is a budget car, only the minimum here.
 |
| clean frontend |
and it was alot easier to remove.
Actually it was easier to remove than it was to order the part online!
I need to do that still.
 |
| removed tie rod assembly |
Usually these are a PITA to take off,
but thanks to either PB-blaster or just luck,
all 6 tie rod ends popped right off without ruining the threads!
Of course before the frontend could be reinstalled,
there was a little rust issue.
 |
| holey unibody |
I had been kinda dreading this one,
as its the "on your back" type work,
and the steel is the chintzest rusty sheetmetal,
really tricky to weld.
 |
| go car not a show car repair |
Definitely not pretty but its strong, alot thicker steel too.
Probably too stiff if there's an engineered flex to the bmw body!
It all looks good though with some black paint.
 |
| partial front end installed |
Just to let you know,
there was one night when I almost considered putting this mustang/pinto front end in it!
 |
| junkyard pinto frontend |
Whew!
It was a low point,
when I compared buying all new balljoints/tie rods/ etc. at $400,
that was just a midnight option!
Along with this 283 I have lying around it would have been one helluva bmw!
 |
| chevy v-8 in water configuration |
After adding up the cost and time of the 5speed conversion,
and the value the car would be after, ($1300-2500)
I realized working on the chopped 40, tres huevos,
was a way better place to throw any "extra" time and money!
So back went the 4-banger and 4-speed.
It is an upgrade to the 2000cc engine at least,
with a little rattlecan rebuild...
 |
| 4-banger back home |
One of my hesitations with the 5-speed 320i transmission conversion,
was the need for a hydraulic clutch mechanism.
The driveshaft shortening was doable,
but a couple hundred on bmw parts...not right now.
 |
| stock 4-spd worms eye view |
Not having to make another tranny mount was also a big perk.
While I cleaned off years of grease and grime off the clutch rods,
I noticed they had some severe wear!
 |
| worn clutch rod |
 |
| rebuilt clutch rod |
Since there are 3 of these hooked ends,
each with a similar wear pattern,
I figured this allowed an easy 5/8"-3/4" of pedal slop.
I'm hoping this is the reason why the transmission is tough to shift.
At first the thought was worn synchros,
but there is a big possibility the clutch was unable to be adjusted properly.
We'll see.
Another issue was the driveshaft bearing.
It was basically nonexistent, the rubber around it had disintegrated.
I never heard any knocking, even at speed,
but it was an accident waiting to happen.
These things are really tough to remove,
so I came up with a rebuild kit...
 |
| 4 rubber rings...4 bolts |
The bearing is held in a metal ring by a thin rubber bellow-like housing.
 |
| perichbrothers rebuild kit |
Since the bearing was ok,
the rubber should hold it in place.
It is really sturdy as the bolts tension the bearing to the housing.
Another $40 saved.
 |
| buttoning up |
So now there's just some wiring and other little stuff left to make it start.
Here's why the dash is white though.
A while back I had listed it on craigslist.
A guy offered to buy just the dash,
so I ended up selling it.
The idea was to build a trick aluminum rally style dash,
but the carpenter neighbor down the street was tossing some cool veneered plywood.
So the idea for a 70's hippy wood dash had begun.
 |
| dash scrap |
A steel rod frame held the first layer of thin plywood.
 |
| first layer |
Than a small strip was cut to beef up the edge.
 |
| crude but effective |
I forgot how easy it was to cut wood versus metal.
 |
| clamped |
Since the plywood scrap was too short for the full dash width,
the glued in rib really helped form the curve.
 |
| good start |
There's alot left to finish the dash,
but nothing crucial that stops the car from driving.
With any luck,
the rusty 40 will be in here by the end of the week,
and this old beemer can get me to and from the shop...
TP
No comments:
Post a Comment