Finally got the garage bench as clean as it's gonna get,
and put the aluminum plate down to make a true welding bench.
There were a few learning curves,
so this is the perfect opportunity to show a
quick HOW TO,
and possibly help someone save some time and money in the future.
I splurged a couple weeks ago and got a TIG setup for the Miller Maxstar 150.
The welder has been a stick only welder for the past 5 years,
but since it is capable of 110/220v it's perfect for the garage.
Fortunately this is the tiggable model as there is an arc only model too.
The only TIG torch I could easily find for the little Maxstar is the legacy LS1725R,
which has a 25 foot lead.
This Weldcraft unit is combined in the Miller kits at the local weld shop.
After some digging I found the 12 foot LS1712R,
which should be sufficient for the garage area.
Hopefully I won't regret not having that extra 13 feet.
My concern was mainly using it with 110v,
and losing amperage as it went so far down the line.
I could only afford this thing by using flipper cash from the paypal account.
The TIG kit was on ebay,
and strangely enough the same company was selling stuff cheaper through there website.
BR Welding Supplies
The weird thing is there's a second website that seems like they are related.
US Welders - Welding Equipment Products - MIG/TIG/Stick Welders & Plasma Cutting
both from Maryland,
but the prices aren't the same.
Anyway the problems with internet orders are
1-shipping time
2- correct or missing parts
The 2 boxes were sent separately from their warehouse and the weldcraft plant,
so they didn't arrive the same time.
That didn't matter cause it took me over a week to hook it up,
then I found out the 25mm adapter was missing.
They'll send one out in a couple days...
Fortunately the local weld shop had one in stock.
A couple months ago I used a similar machine as a TIG unit,
(which gave me the idea to set it up instead of the Dynasty)
and after much trial and error,
had figured out how to hook these babies up.
It is a strange design.
Typically the ground is negative and the stick is positive.
On the Maxstar the ground is positive,
and the tig torch is negative.
The way we'd found out on the friends machine,
is the argon gas passes through the actual negative post.
Check out the picture and you'll see the little hole.
The legacy torch has the integrated finger remote switch.
I've got one on the Dynasty but prefer the foot pedal,
only cause i've not practiced with it enough to be comfortable.
I thought I'd be sneaky and since I had ordered the 6-pin torch
that the maxstar needed,
I'd also order a 14-pin to 6-pin adapter so my foot pedal could be used.
Well funny enough there is no such thing as a 6-pin torch.
They just add the 14-6 pin adapter (miller #300507) to the order.
So now I've got an extra $45 adapter.
Ah hell.
The one thing I didn't forget to order is the actual tig consumable kit.
You would expect the torch to come with all the pieces but it doesn't.
Since the 17 series is geared for light duty,
there was an .040 tungsten electrode included.
It's awesomely thin and it looks perfect for sheetmetal.
Will be fun to use that one.
Here's the good old tungsten grinder.
I've had this for many many years,
was passed down from my grandfather - papa.
I love this old tool,
it has the coolest sounding noise to it.
Finally the little TIG was all hooked up.
All good right?
I started out with the foot pedal,
fixing Jakob's recent $1 Razor score which was a little loose.
What the heck the thing didn't seem to want to work.
Was it the nasty chrome/paint steel?
Nope.
It was the old scratch-start TIG technique.
I've been so spoiled with the High Frequency auto-start,
the touch and go spark isn't normal.
So time to get some welding 101 in and start practicing.
Broke out some new gloves,
and dug out a stagnant project a friend had been bugging me about for weeks.
Hey I'm just the welder not the engineer on these!
Really should have unplugged the foot pedal to get used to the hand control.
Next time.
Well bottomline,
this is a bitchin little welder.
Using the 1/16 tungsten the dial was at 60,
with more than enough power for thicker material later on down the line.
Biggest bummer is not being able to weld aluminum,
but I've got other machines for that.
Hope this helps someone out!
TP
and put the aluminum plate down to make a true welding bench.
There were a few learning curves,
so this is the perfect opportunity to show a
quick HOW TO,
and possibly help someone save some time and money in the future.
 |
| about time |
I splurged a couple weeks ago and got a TIG setup for the Miller Maxstar 150.
The welder has been a stick only welder for the past 5 years,
but since it is capable of 110/220v it's perfect for the garage.
Fortunately this is the tiggable model as there is an arc only model too.
 |
| weldcraft legacy LS1712R tig torch |
The only TIG torch I could easily find for the little Maxstar is the legacy LS1725R,
which has a 25 foot lead.
This Weldcraft unit is combined in the Miller kits at the local weld shop.
After some digging I found the 12 foot LS1712R,
which should be sufficient for the garage area.
Hopefully I won't regret not having that extra 13 feet.
My concern was mainly using it with 110v,
and losing amperage as it went so far down the line.
I could only afford this thing by using flipper cash from the paypal account.
The TIG kit was on ebay,
and strangely enough the same company was selling stuff cheaper through there website.
BR Welding Supplies
The weird thing is there's a second website that seems like they are related.
US Welders - Welding Equipment Products - MIG/TIG/Stick Welders & Plasma Cutting
both from Maryland,
but the prices aren't the same.
 |
| weldcraft 195234 |
Anyway the problems with internet orders are
1-shipping time
2- correct or missing parts
The 2 boxes were sent separately from their warehouse and the weldcraft plant,
so they didn't arrive the same time.
That didn't matter cause it took me over a week to hook it up,
then I found out the 25mm adapter was missing.
They'll send one out in a couple days...
Fortunately the local weld shop had one in stock.
 |
| maxstart 150 stl |
A couple months ago I used a similar machine as a TIG unit,
(which gave me the idea to set it up instead of the Dynasty)
and after much trial and error,
had figured out how to hook these babies up.
It is a strange design.
Typically the ground is negative and the stick is positive.
On the Maxstar the ground is positive,
and the tig torch is negative.
The way we'd found out on the friends machine,
is the argon gas passes through the actual negative post.
Check out the picture and you'll see the little hole.
 |
| hookin it up |
The legacy torch has the integrated finger remote switch.
I've got one on the Dynasty but prefer the foot pedal,
only cause i've not practiced with it enough to be comfortable.
I thought I'd be sneaky and since I had ordered the 6-pin torch
that the maxstar needed,
I'd also order a 14-pin to 6-pin adapter so my foot pedal could be used.
Well funny enough there is no such thing as a 6-pin torch.
They just add the 14-6 pin adapter (miller #300507) to the order.
So now I've got an extra $45 adapter.
Ah hell.
 |
| ceriated tungsten |
The one thing I didn't forget to order is the actual tig consumable kit.
You would expect the torch to come with all the pieces but it doesn't.
Since the 17 series is geared for light duty,
there was an .040 tungsten electrode included.
It's awesomely thin and it looks perfect for sheetmetal.
Will be fun to use that one.
 |
| ancient grinder |
Here's the good old tungsten grinder.
I've had this for many many years,
was passed down from my grandfather - papa.
I love this old tool,
it has the coolest sounding noise to it.
 |
| belt grinder |
Finally the little TIG was all hooked up.
All good right?
 |
| miller maxstar 150 stl |
I started out with the foot pedal,
fixing Jakob's recent $1 Razor score which was a little loose.
 |
| Razor surgery |
What the heck the thing didn't seem to want to work.
Was it the nasty chrome/paint steel?
Nope.
It was the old scratch-start TIG technique.
I've been so spoiled with the High Frequency auto-start,
the touch and go spark isn't normal.
 |
| Home Cookin' |
So time to get some welding 101 in and start practicing.
Broke out some new gloves,
and dug out a stagnant project a friend had been bugging me about for weeks.
Hey I'm just the welder not the engineer on these!
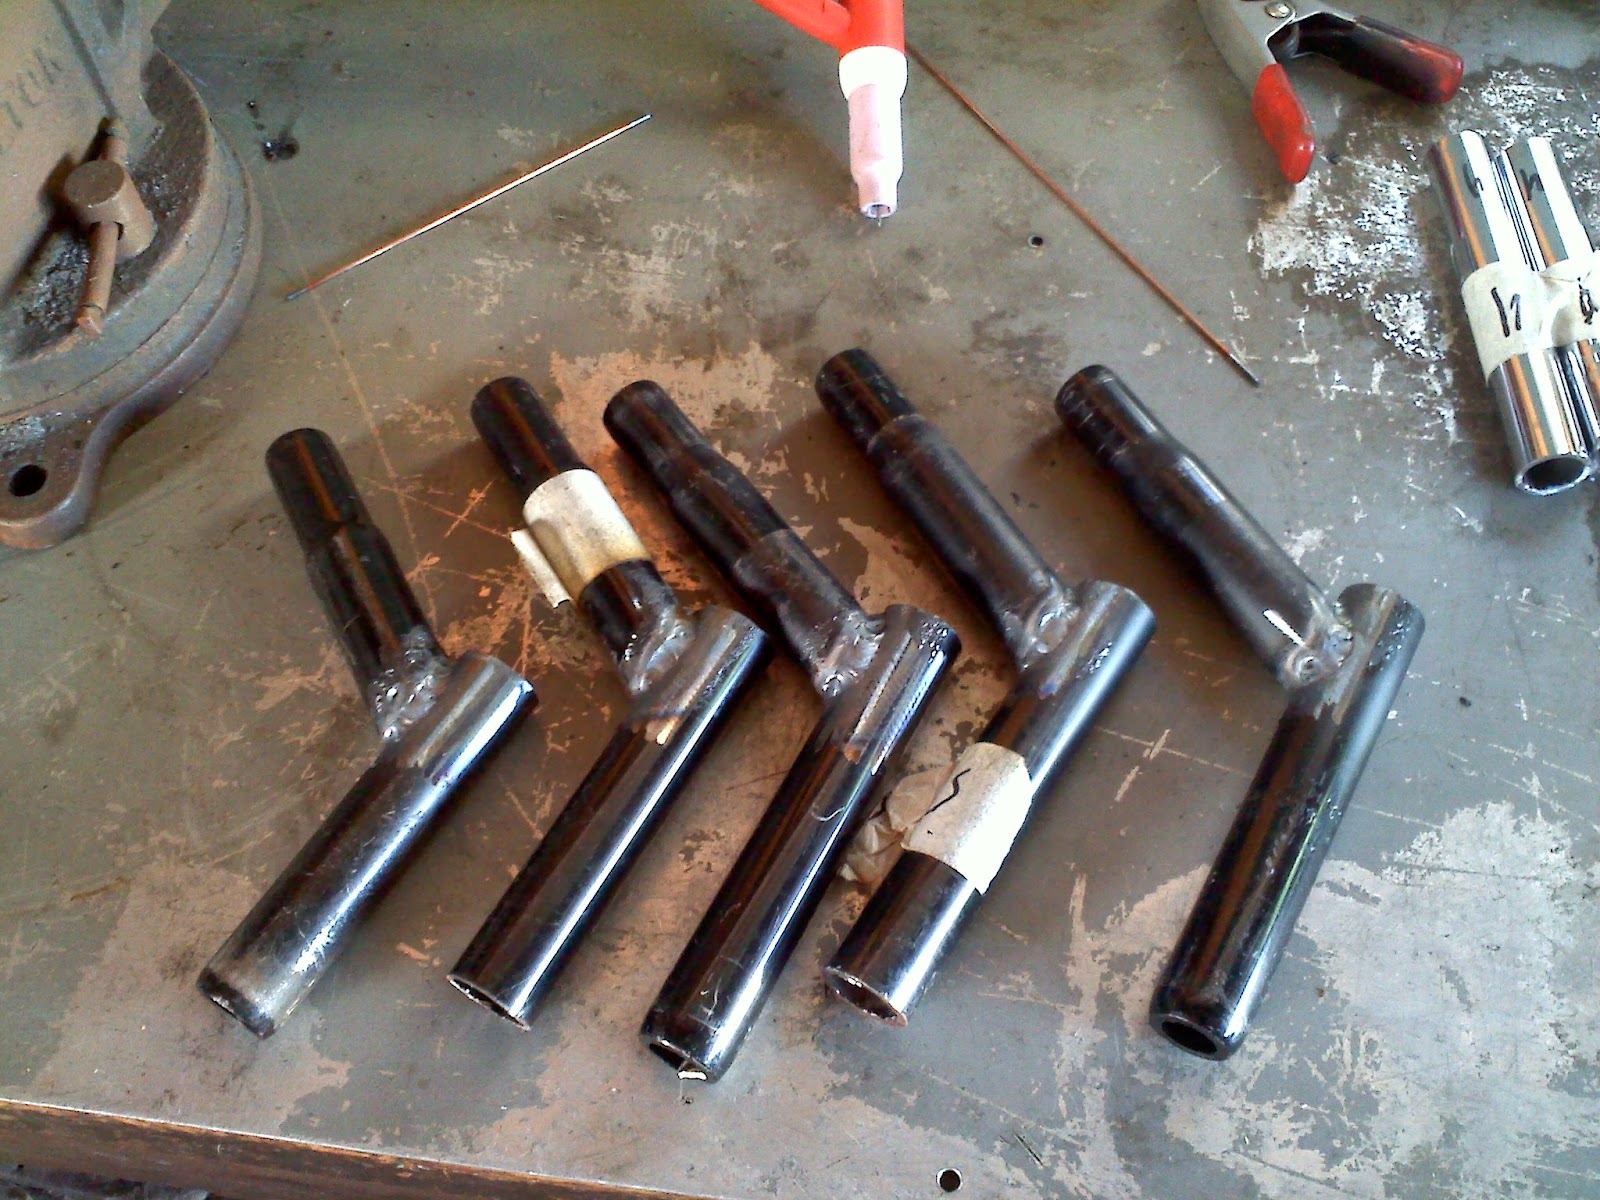 |
| bent seat posts |
Really should have unplugged the foot pedal to get used to the hand control.
Next time.
Well bottomline,
this is a bitchin little welder.
Using the 1/16 tungsten the dial was at 60,
with more than enough power for thicker material later on down the line.
Biggest bummer is not being able to weld aluminum,
but I've got other machines for that.
Hope this helps someone out!
TP
No comments:
Post a Comment