19 March 2013

mountains and mole hills

You guys are probably tired of the same front shot of the ford running gear,
so here's the tranny side of the 40 ford project.
To the trained eye,
a ton of little things have been done,
and I'm going to show you in way too extreme detail...
ford AOD tranny


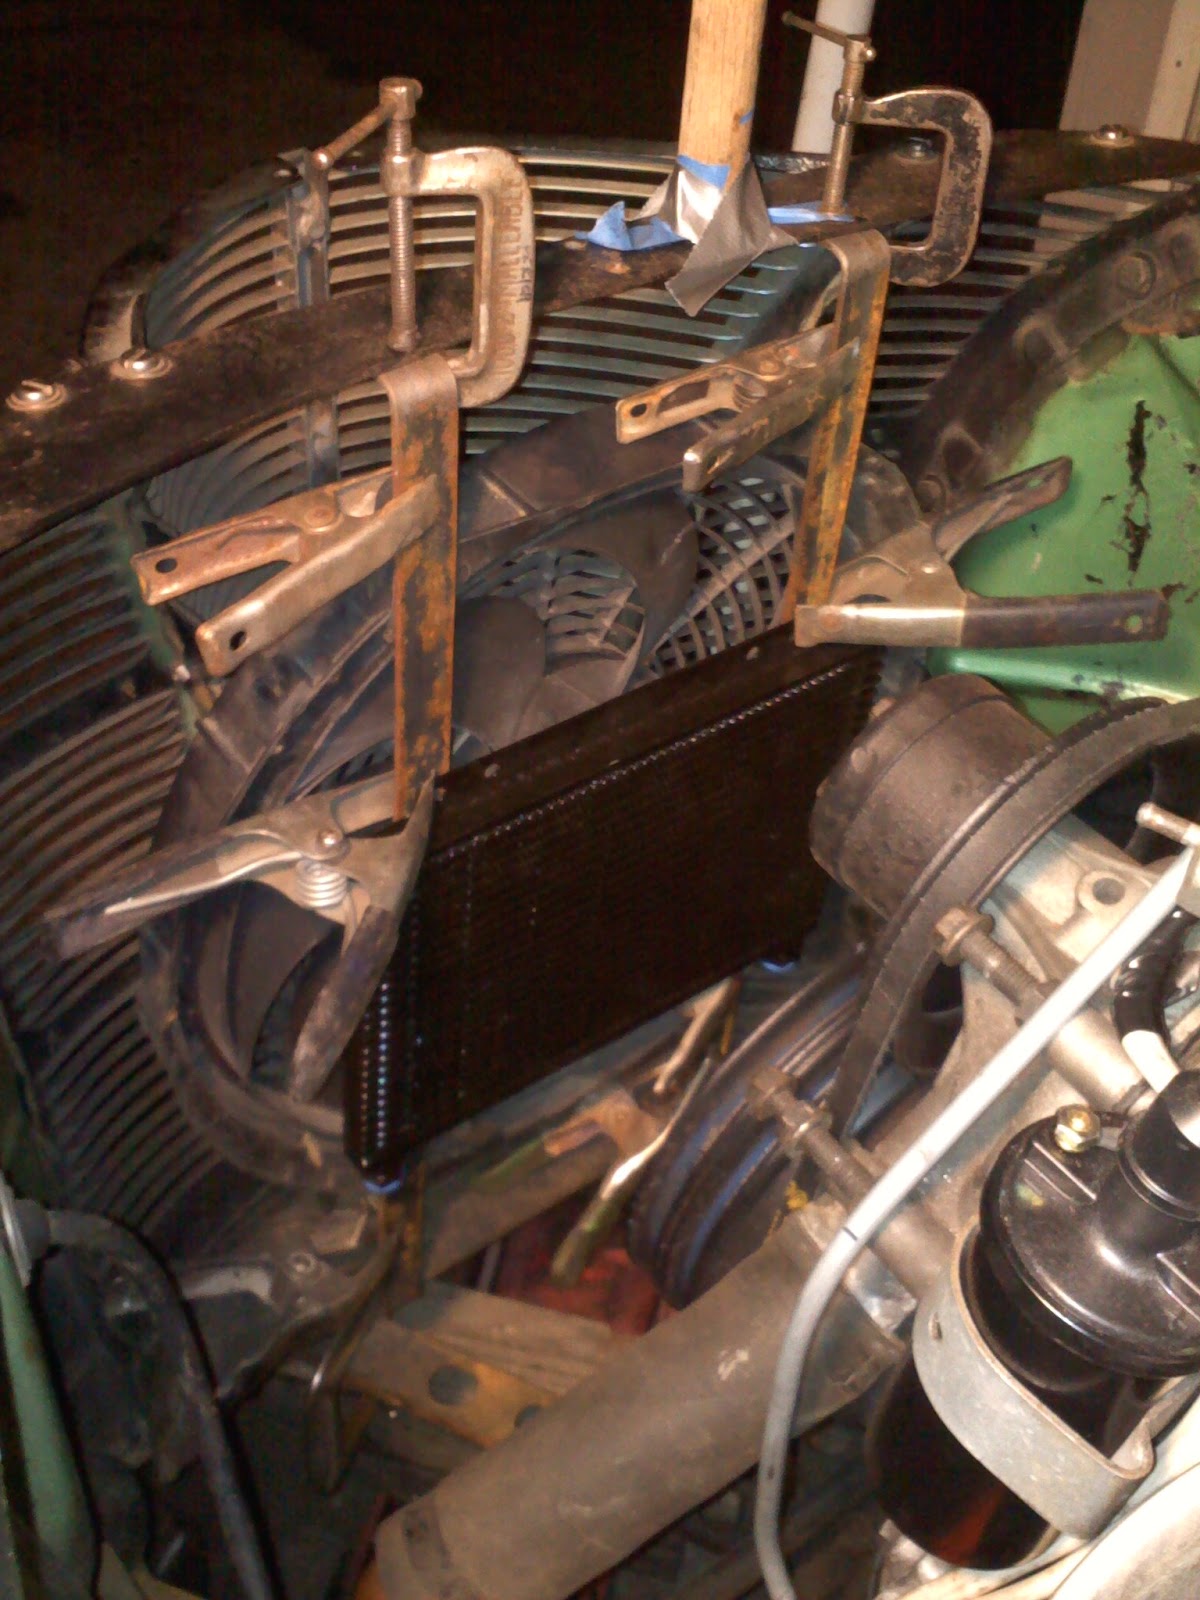
Last time I left you the tranny cooler & fan were all clamped up.
A couple changes and the brackets were drilled and tapped.
stool time with macey james perich


These skateboards are the new work bench.
You'll see what I mean in future posts.
mores stool time with MJP


After a couple quick tweaks,
the brackets were shined up and painted.
Everything looks good in flat black.
tranny cooler + electric fan assembly - 1940 ford


This better fit as it was mocked in and out a half dozen times,
along with the actual radiator.
I could barely wait for the paint to dry.
tru-cool lpd-4707 transmission cooler


The local auto parts store can't put enough stickers
on these dang painted steel lines.
Besides that they are rarely straight.
Surprised they don't have a shipping tube for them.
stickers


Tip - I've found the best way to remove stickers is not with your fingernail,
unless you don't mind the nail ripping.
Fortunately there are 10 of them.
The glue residue comes off easily with some wd-40 and a rag.
clean


I was even prepared with the big 3 special $8 tubing bender.
What a hunk of crap.
Long ago I had a similar one that worked half way decent,
but the tube slots were smooth not painted.
Regardless this thing was a waste of money for the 5/16" line.
worthless fuel & brake line bender


One thing that shouldn't be working still is this harbor freight flare kit.
I'm going to brag that I've never actually bought anything from harbor freight,
however I have bought used stuff that other people have bought from there!
This was supposed to be a one job tool,
and it has lasted through many many ends.
Funny cause I've got a nice one for metric that I've never used.
harbor freight's bulletproof double flare tool


After resorting to the tried and true hand bending method,
the transmission lines were completed in 2-piece sets.
If that cheeseball tubing bender hadn't ruined the 4th line,
I could have saved myself the trip to the parts store.
3 out of 4


The lines were routed down below the radiator,
than alongside the oil pan underneath the starter.
It was the most logical way.
I'm thinking of making some kind of belt guard,
just to protect the lines.
tranny cooler mounting


It would have been much easier going bosozoku style,
with the cooler in front of the bumper.
bosozoku transmission cooler
ripped pic - speedhunters


It was an easy choice not to as I can't afford those steel braided lines!
I did upgrade from a freebie hose-barb tube style cooler,
to a tru-cool stacked plate cooler with threaded inserts.
It's really tiny but is rated at 16000 BTU.
I'm hoping the hard line fittings will stop any pesky leaks.
line routing


While my hands were in the mood,
I decided to redo the fuel line as well.
Now it goes all the way to the old feeder line,
which is next to the transmission.
I'm betting the looseness of the length,
will be enough to not need rubber hose.
fuel line


There's only a few things to do to start the engine -
- oil, hot coil wire, cap radiator holes, coolant...
actually there are too many things to just rush through it.
lincoln AOD TV cable


So instead I pulled out one of the bigger obstacles.
This is the original Lincoln Throttle Valve (TV) cable
that came with the engine and transmission.
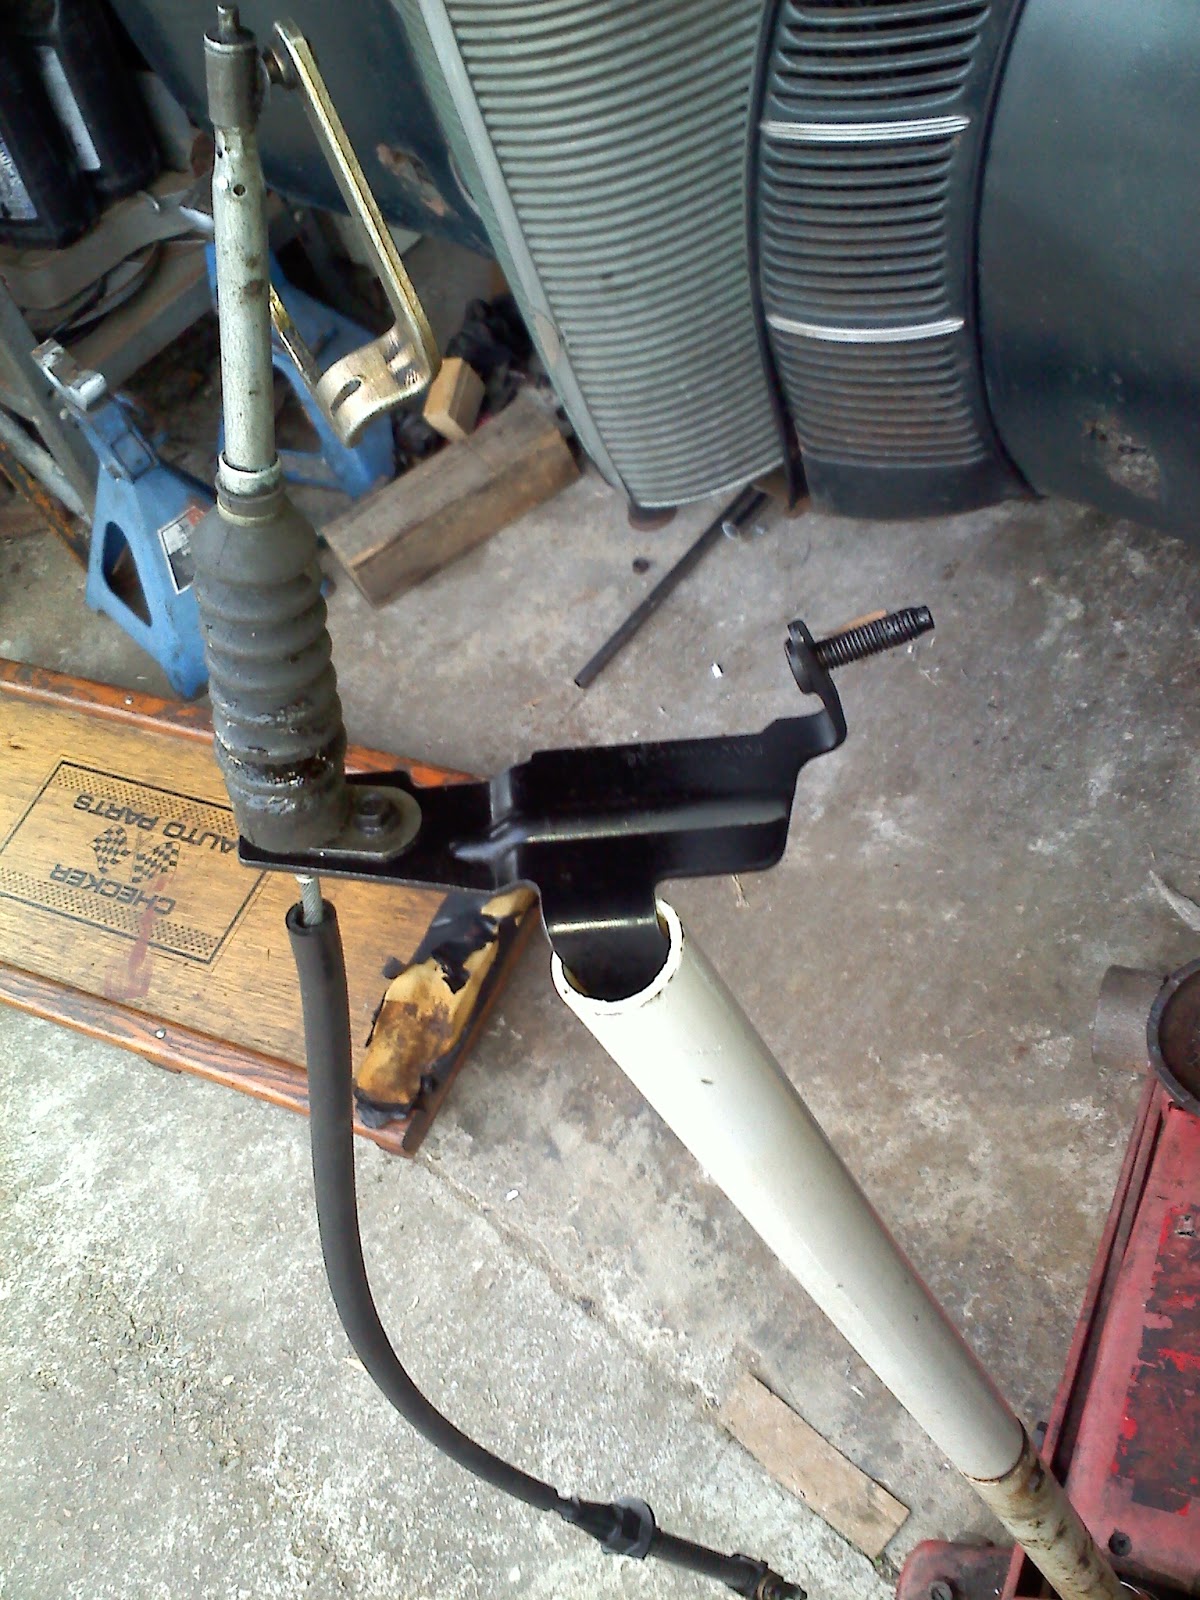
modified FORD TV cable


The housing was modified a little just to clean it up.
As you can see the length is basically perfect to the carburetor.
The tricky part is figuring out how to attach it and make it work!
ford AOD TV cable to carburetor


If you look closely,
there are two gold bolts on the intake.
The next project is making a bracket that attaches the line to those bolts.
Than the throttle needs to be modified to hold the cable end.
Many will think it is easier to use the Lokar TV cable,
but the Ford one is a really clean easy to adjust design.
It is worth the effort.
Cross your fingers for me!

TP

18 March 2013

lucky 13

The suggested 13th anniversary present is the acrylic portrait,
and after seeing this gem at the local swap meet,
I realized that maybe I screwed up by not getting ours done in time.
acrylic portrait gem


After all these years you'd figure I'd be good at this!
I better go figure something out...
*************************************

Ella Fitzgerald  - It don't mean a thing - great 1958 version.
Never seen a guy jam on the violin like that!
stuff smith - violin
oscar peterson - piano
herb ellis - guitar
roy eldridge - trumpet
I need to get this show on "tape"!
****************************************

Happy Anniversary Sweet Pea!
XOXO

TP

16 March 2013

little chiquita

Yeah yeah yeah I know.
Another friggin stereo post.
sherwood s-7100a


This little receiver was begging to be adopted.
The guy I got it from - Harry,
had listed and relisted it so many times,
and his prices fluctuated like the corner gas station.
When it dropped down to under 2-20's I had to bite.
little chiquita - sherwood s-7100a


The receiver was hooked up at his house and sounded crispy enough for my ears.
His cell picture rivaled my blurry droid pictures,
so I was pleasantly surprised with the condition.

The design is really simple.
Not sure if this is because it was made in the US
or if it was just an early solid state low budget model.
sherwood s-7100a guts


Of course I had to open it up as soon as I got home.
This is an old one about 1971 or so,
and has the cool slip in wooden cover.
Really nice wood veneer too.
The thing was like brand new inside.
sherwood s-7100a inside


At 17 wpc,
this is the smallest receiver I've had.
The inside parts were really tiny and sparse.
It looked closer to a pre-amp than an amplifier.
I am spoiled with 110-300 watt systems I guess.
recapped s-7100a board


As I looked closer,
it was obvious this thing had been recently gone through.
The capacitors,
those purply battery looking things,
had CE   (Conformité Européenne) labels all over them,
which means they were at least 1993.
Hmmm.
This one was definitely worth a hook up.
blurry onkyo tx-8500


The little receiver is half the size and weight of the onkyo tx-8500,
and almost 20 percent of the power!
The good thing is it sips only 100 watts at max volume,
versus the 400 watts of the onkyo.

Funny thing is I got the onkyo from the same guy,
and he had done the same price fluctuation thing,
but he actually delivered it last time!
Still one of the better stereo deals I've done.
klipsch heresy + kg4 + sherwood s-7100a


At first run I've got to say I was a bit overwhelmed with the sound.
These are supposed to have a warm tube-like sound.
Instead it was clean but with a super thumpy bass.
I was cheating using the IPOD's equalizer,
so that was easily flattened out.
The other problem is I don't listen to studio recordings,
usually live refined bootlegs,
which are tougher to dissect the sound with.
After a while the speakers gelled a bit better,
and I got some work done,
with the sound going into the background.

I'll give it a chance over the weekend.
I'm kinda thinking that whoever owned it never really played it,
and maybe all the electrolytics(?) need to be burned in.
I left the radio on all night just to test the theory.

Still I think I'm one of those guys that likes to listen to a strong stereo at lower volume,
than a weaker stereo at a higher volume setting.

Stay tuned...

TP

** Okay so I gave it a good workout over the weekend.
Actually left it on overnight just to give it some good run time.
I've got to say at 17 watts this thing packs a punch.
It did warm up to the speakers the more we listened to it,
not sure if it was me or the receiver settling in.
Now I'm on the fence whether or not to put the big onkyo back...

dishwasher

Ok this is for all the gearhead readers out of the fortunate 32,
that are wondering what the heck is going on with all the talk of stereos,
kids and what-not.
I'll admit it's tricky to write one of these blogs if you are too focused.
Since I'm basically screaming into the wind here,
you guys get an unfiltered look into any shiny thing that catches my eye!
1940 ford coupe -  project june bug


Last week I wrote about my epic progress with the steering u-joint.
A truly incredible task on its own in terms of feebleness.
It made me realize I'd better get my a$$ in gear!
modifying motor mount


The problem I whined about last week
was the amount of unexciting projects.
It's like washing silverware when doing the dishes,
lots of them but they don't take up enough space,
so it doesn't look like much was actually done,
although it takes more time to fill the sink,
than it does one big ole pot.

On a side note that brings up an interesting tangent.
I'm the head dishwasher of the family,
as that is what keeps my hands so soft.
Yeah.
Well I noticed that even when our sink is totally full,
like it is every day,
I'll usually start with the utensils.
(the exact opposite of what I like to do on the car projects!)
and I'll use that rinse water to soften up all the dried egg
or whatever it is that is on the plates and bowls.
Usually I'll leave the big pot or mixing bowl,
as I use that to hold all the soapy water.
However,
when the wife does the dishes,
she'll do the exact opposite,
and leave all the silverware in the sink.
I guess that's why I'm the dishwasher!
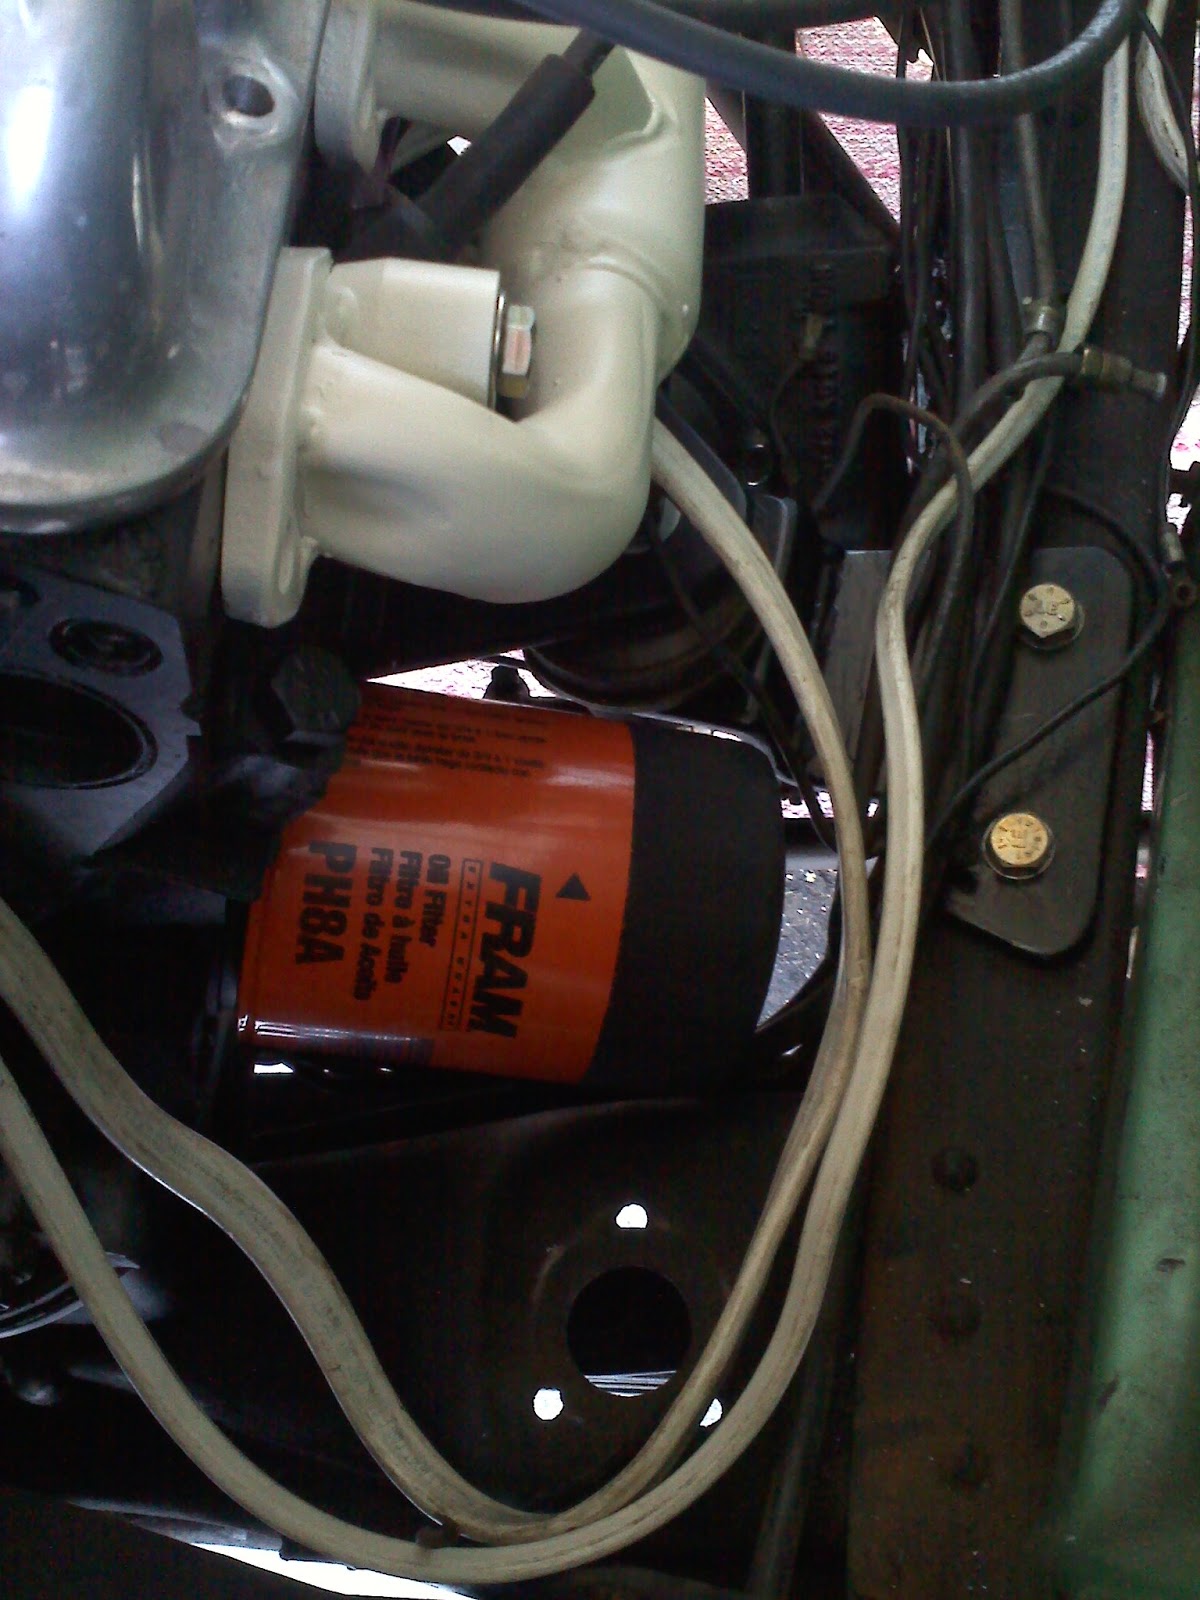
302 oil filter notch


Wow now wasn't that a tangent!
Well one of the things on my STD list was to notch the engine mount,
as the oil filter didn't quite fit.
A couple passes with the grinder and now the engine can be filled with oil.
early ford starter wiring


Next on the list was figuring out how to wire up the newer starter.
There is a solenoid attached to the 5.0 starter,
unlike the flathead starter which needs a remote solenoid.
newer starter with older ford solenoid


At first I thought there was no need for the original starter solenoid.
With the help of the internet the correct wiring diagram was found,
but I'm not going to rip it off and post it on here,
instead I'll replace it with words...

Only one new wire was needed,
going from the temporary hot side to the new starter solenoid.
The big hot actually goes to the permanent hot side of the old solenoid,
so the starter is always hot.
This made the wiring easy as all the hot jumpers didn't have to be moved.
I'll be cleaning this up with some zip ties later on!
It was a big relief when the engine actually turned over with the push of the button,
and didn't continue turning after I let it off.
vintage soldering set


Next thing was to button up the wiring.
This was like hitting the brick wall on the STD list.
There's only 7 wires or 14 ends left,
but it took ridiculously long to visualize.
One of the issues was using this scrap boat multi-wire,
instead of running separate strands.
As you can see I had a habit of running only black wire,
so it's impossible to tell which wire is which later on.
The new white wire made it so simple,
my mind was trying to make it more confusing than it really was.
All the ends were soldered and heat shrinked,
and I'll zip tie everything once I know it works.
90% finished


The only wire I need now,
is the hot that joins the ignition, red coil wire, and voltage regulator.
I've got a series of toggle switches instead of a key ignition,
so that will give me a chance to clean up the dash wiring.
radiator hose scraps


Another exciting thing on my list was the radiator hoses.
I piled up all the old hoses,
and found some copper reducers to do some cut and paste.
flathead radiator hoses


The reducers make it easy to fit hard to find hoses.
This method has worked on the RPU flathead without a hitch.
1940 ford 302


It's tough to see but the hoses are all fit without the hose clamps.
I got lucky having that donor pile.
I'll still need to plug the extra radiator holes.

If you look closely,
there is now a fuel line to the carburetor!
I originally planned to u-turn it to go to the back of the engine,
and again I over-thought that layout.
A scrap tube I had saved from the chief rebuild (2 years ago!)
was bent in about 5 minutes,
and now I'm not sure why I was thinking doing it any other way.
There still needs to be some hose to connect the existing line.
transmission cooler & fan mock up


Tonight I started on the fan and transmission cooler bracketry.
I want them independently mounted so the radiator will be easier to remove,
without having to cut the zip tie mounts which make holes in the radiator fins.
A little preplanning in case I have problems.

If I'm lucky this will be finished tomorrow.
I'd love to fill it with fluids and start it up!

TP

12 March 2013

stool time xii

Here's a little confirmation that some of the best times
come totally by accident.
Macey's tire chair


Over the weekend,
I tried to clean up the yard a little bit,
and also save $10 by cutting some tires off these old rims.
macey's tire project


Tip - this wasn't quite the money saver I expected.

The first tire was stuck on the rim,
which made it really easy to cut,
but oh man the ring that was left over was a mess.

The second tire was loose on the rim,
which made it a little harder to cut,
but was easier to get at the steel cables along the edge.
cutting tire


What happened next was quite unexpected.
Since the first tire had no frayed wire cables,
the leftover pieces were about as fun to a kid
as a big old cardboard box,
which is really fun.

I messed up and didn't take as many pictures as I should have,
and maybe we'll re-enact some of them later.
Like this one...
macey's rocking chair


Ultimately they ended up rivaling the old stool.
After playing with the tires all day...
...wind block, shoot-em-up defense, rocking chair...
the kids had cleaned them up pretty good.
Fortunately they were wearing black.
jakob & macey - tire stool time


So yeah there goes trying to clean up the yard!

TP

11 March 2013

time

What a relief that daylight savings time has finally arrived.
The days of darkness at 6pm have finally passed.


I've been slacking on our car projects,
life and making ends meet has become a priority.
In celebration of the change I made sure to throw some time in,
and wow what a slacker of a day.

u-joint modification


Way too much time was spent just studying what was going on,
like someone else had started the project and I am here to finish it.
Fortunately there wasn't too much stuff stashed in, on or around.
How many times have I said the death to a project is when it becomes a shelf!

After absorbing enough information,
the realization was that there were tons of little time consuming projects.
Nothing huge and grandiose that would show a ton of progress with little work.
40 piece tap and die set - montgomery ward


Is one of my problems finding something to post on this blog?
Usually this thing gets me more motivated.
Anyway while I was modifying this u-joint,
the old tap and die set was pulled out.
The perfect photo-op.
40 piece tap and die set - lithograph box


This box was a hand-me-down from my grandfather (papa),
and I've used it for at least 20 years now.
It has a bitchin lithograph box - made in Japan.
tap & die set - montgomery ward - 84-5575


This falls into the category of Papa's Hammer -
the one that has had the handle and head replaced a couple times,
but is still Papa's Hammer.

Most likely every tap in here is not the original tungsten steel special,
swapped one by one with better HSS or chromoly replacements.
Same with the handle,
 the cheesy montgomery ward version died long ago.
I will say the dies are all complete and have been used countless times.
The best thing is the box is a great way to organize,
although there is another shoebox (kid size!) full of handles and taps too.

Most importantly,
it's one of those feel good things that brings back important memories.
weld-on u-joint modification


My goal was to modify this weld-on u-joint for a temporary set screw,
so I could simulate the steering without actually welding.
It will also be good backup after.
1940 ford project


A good chunk of time was spent cutting down the steering column,
and centering the drag link for equal steering.
Finally.
By then my hands were too greasy for blurry cellphone pictures.
With the extended daytime hours I've got to make sure I'm out here more often!

TP

08 March 2013

blasphemy

A couple weeks now,
and the old McIntosh MC2300 is still heating up the house.
perich brothers (and sister): hot rod amplifier
temporary setup
mcintosh mc2300 - sansui 9090 - jbl 4311


With the temporary hook-up to the sansui 9090's preamp a bit overkill,
I've been on the hunt for a real preamplifier or control amp.
mcintosh c24 project


Sean had horse traded me with a super nice 60's mcintosh c24 preamp,
as usual a passed down project.
mcintosh c24 guts


For a 50 year old piece of electronic equipment,
this was like brand new inside,
looking anyway as there was no sound.
mcintosh c24 tone board?


The layout is so simple looking,
this would be the perfect preamp to do some hotrodding to.
Tech's will change those capacitors,
the larger black battery looking things for example,
to different brands and styles to change or upgrade the sound.
 (rubycon/black gate, elna, nichicon etc.)
There are also some really high end versions out there.
Audio Capacitors

After a couple weeks of looking at this thing,
I realized that right now this was out of my comfort zone.
If the pre had at least worked it would be a different story.
With this one it was like looking at a bowl of spaghetti,
I didn't know where to start.
Changing the parts isn't difficult,
it is the testing and knowing where and what values to look for.
This will probably go down the road...
sansui seven receiver


At the swap meet I found a killer deal on an early 70's Sansui Seven.
The guy said it was scratchy but for the price it was worth a gamble.
sansui seven receiver back end


The pre-out option made this one a good consideration as a preamp.
That's where the U shaped connectors are - right there in the center.
sansui seven receiver guts


Well the sound was way worse than scratchy,
more like garbled.
I did the cheap clean and lube to the pots - controls,
but no luck.
sansui seven quick fix


The sound was distorted early on,
even through the headphone jack,
so as a preamp it was another project.
Now this one is on the way to Texas - FEDEX best deal!
shipping vintage receiver - fedex ground


By chance another preamp had popped up on craigslist,
and truthfully I wasn't really searching to intently,
although it doesn't seem like it from this post!
fisher cc-3000 control amplifier - preamp


This may be blasphemy to the hardcore McIntosh followers,
but I was actually looking for a Kenwood Basic C1 or C2  preamp.
a little sterile or new especially for a MC2300.

The idea was to hear if the "color" of the amp would be enough,
without the warmth of the early solid state.

Those Kenwoods are supposed to be an easy amp to upgrade
Online Store
with the similar capacitor upgrades.
mcintosh mc2300 - fisher cc-3000 preamp


When this Fisher popped up,
it seemed similar enough that it was worth a listen.

A quick test and this definitely needed a quick cleaning.
This newer (80-81) technology is way different than the early stuff.
Very simple and sparse layout.
This thing doesn't even have a headphone amp or jack!
Remember the cap swap I was just talking about?
This one seemed way easier to do.
Why does opening these up make me think about tearing them apart?
fisher cc-3000 preamplifier guts


With the Fisher hooked up,
the sound was crisp and clear.
A relief after the earlier misses.
mcintosh mc2300 + fisher cc-3300 + sansui 9090


Now at least the Sansui 9090 can be rewired to itself,
and separated from the McIntosh.
While the Fisher may be underkill for the McIntosh specs,
it is a simple way to allow some budget listening hours.
The sound is actually really clean!
mcintosh mc2300 - fisher cc3000 - sansui 9090 - jbl 4311


Now I really got to figure out a place to put this stuff.
I've been knocking around an idea for a rolling stand,
which is exactly what I don't need to spend my time on!

TP